[TOC]
0x00 前言简介 描述:最近接手了公司的固定资产的管理工作,一看到用Excl记录的固定资产信息我就产生了一种想法,手工(上/下帐)管理太麻烦了于是找一款开源的固定资产管理进行管理。
0x01 Snipe-IT 1.简单介绍 Snipe-it是一款开源的资产管理系统,采用Laravel的PHP框架进行编写。在实际工作中,完全替代EXECL表格的资产管理。支持多语言,方便公司全球化扩张。https://snipeitapp.com/ https://snipe-it.readme.io
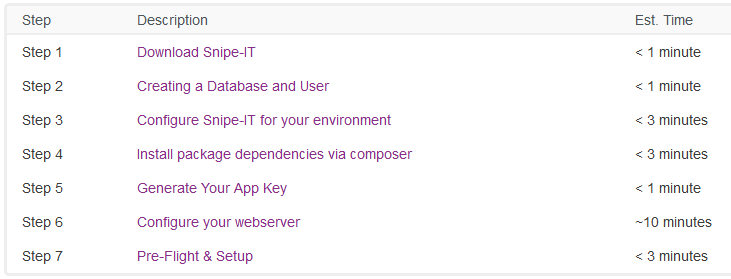
2.搭建流程 环境构建:
CentOS7
Snipe-Mysql
Snipe-IT
安装版本系统信息
[TOC]
0x00 前言简介 描述:最近接手了公司的固定资产的管理工作,一看到用Excl记录的固定资产信息我就产生了一种想法,手工(上/下帐)管理太麻烦了于是找一款开源的固定资产管理进行管理。
0x01 Snipe-IT 1.简单介绍 Snipe-it是一款开源的资产管理系统,采用Laravel的PHP框架进行编写。在实际工作中,完全替代EXECL表格的资产管理。支持多语言,方便公司全球化扩张。https://snipeitapp.com/ https://snipe-it.readme.io
2.搭建流程 环境构建:
CentOS7
Snipe-Mysql
Snipe-IT
安装版本系统信息1 2 3 4 Snipe-IT version v4.7.8 build 4170 (g4fe689dc5) 软件许可证 AGPL3 PHP版本 7.1.33-1+ubuntu16.04.1+deb.sury.org+1 Laravel版本 5.5.47
1.安装步骤:
weiyigeek.top-
下面我们采用最简单的Docker部署的方式进行安装:1 2 3 4 5 6 7 8 9 10 11 12 13 14 15 16 17 18 19 20 21 22 23 24 25 26 27 28 29 30 31 32 33 34 35 36 37 38 39 40 41 42 43 44 45 46 47 48 49 50 51 52 53 54 55 56 57 58 59 60 61 62 63 64 65 66 67 68 sudo mkdir -p /app/Snipe-mysql /app/Snipe-conf sudo tee /etc/yum.repos.d/docker.repo <<-'EOF' [dockerrepo] name=Docker Repository baseurl=https://yum.dockerproject.org/repo/main/centos/$releasever / enabled=1 gpgcheck=1 gpgkey=https://yum.dockerproject.org/gpg EOF yum install docker-ce docker-compose -y php artisan key:generate MYSQL_ROOT_PASSWORD= MYSQL_DATABASE=snipeit MYSQL_USER=snipeit MYSQL_PASSWORD= APP_ENV=production APP_DEBUG=false APP_KEY=base64:5U/KPKw1GN/Rz0fWYO/4FsSOqjmjvDAQzMCqwcAqstc= APP_URL=http://127.0.0.1:80 APP_TIMEZONE=Asia/Shanghai APP_LOCALE=zh-CN PUID=1000 PGID=1000 DB_HOST=db DB_DATABASE=snipeit DB_USERNAME=snipeit DB_PASSWORD= DB_DUMP_PATH='/usr/bin' LOGIN_MAX_ATTEMPTS=5 LOGIN_LOCKOUT_DURATION=60
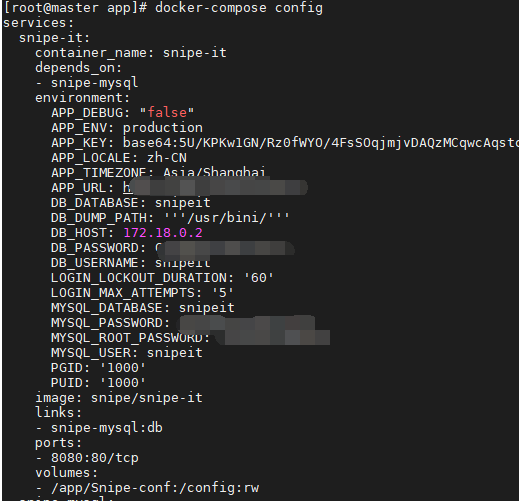
1 2 3 4 5 6 7 8 9 10 11 12 13 14 15 16 17 18 19 20 21 22 23 24 25 26 27 28 29 30 version: '3' services: snipe-mysql: container_name: snipe-mysql image: mysql:5.6 env_file: - ./.env volumes: - /app/Snipe-IT/data:/var/lib/mysql command: --default-authentication-plugin=mysql_native_password ports: - "3366:3306" snipe-it: image: snipe/snipe-it container_name: snipe-it env_file: - ./.env ports: - "8080:80" depends_on: - snipe-mysql volumes: - /app/Snipe-IT/web:/config links: - snipe-mysql: db [root@192 app]# docker-compose config
weiyigeek.top-
1 2 3 4 5 6 7 8 9 10 11 12 13 14 15 16 17 18 19 20 21 22 23 24 25 26 27 28 29 30 31 32 33 34 35 36 docker-compose up
weiyigeek.top-
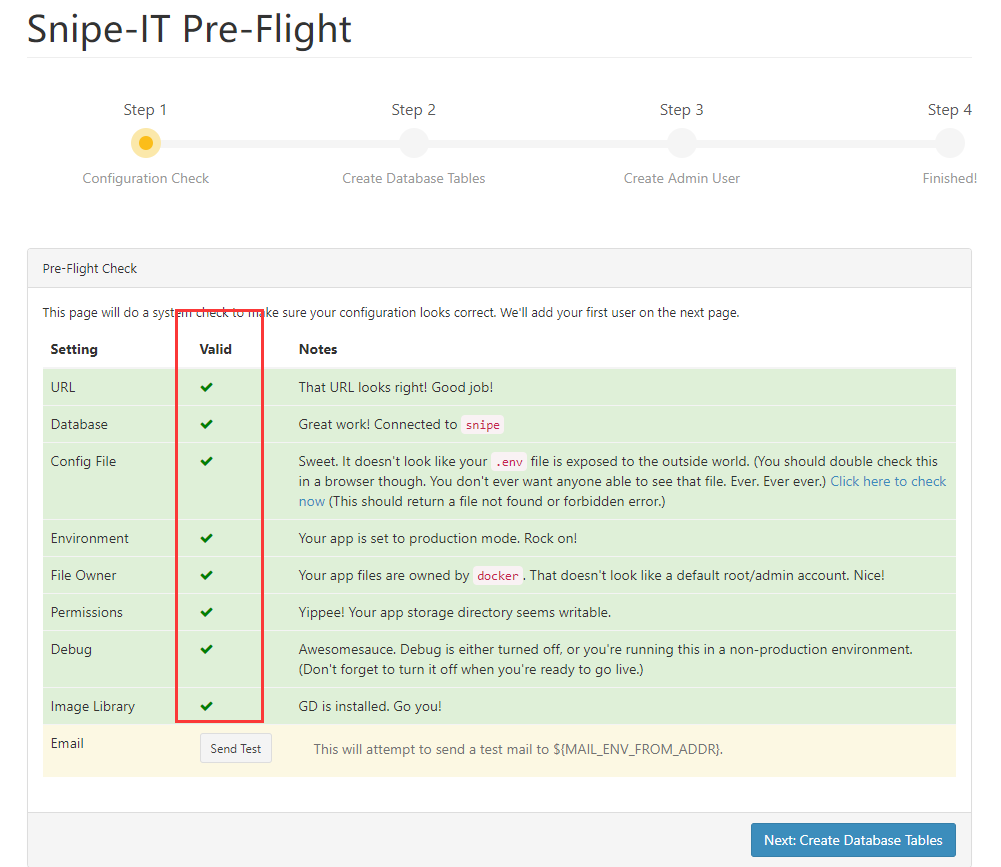
打开浏览器访问设置好的站点 http://10.10.10.10:8082/setup 并且检测相关条件是否符合(Create Database Tables)
weiyigeek.top-Snipe-IT Pre-Flight Setup
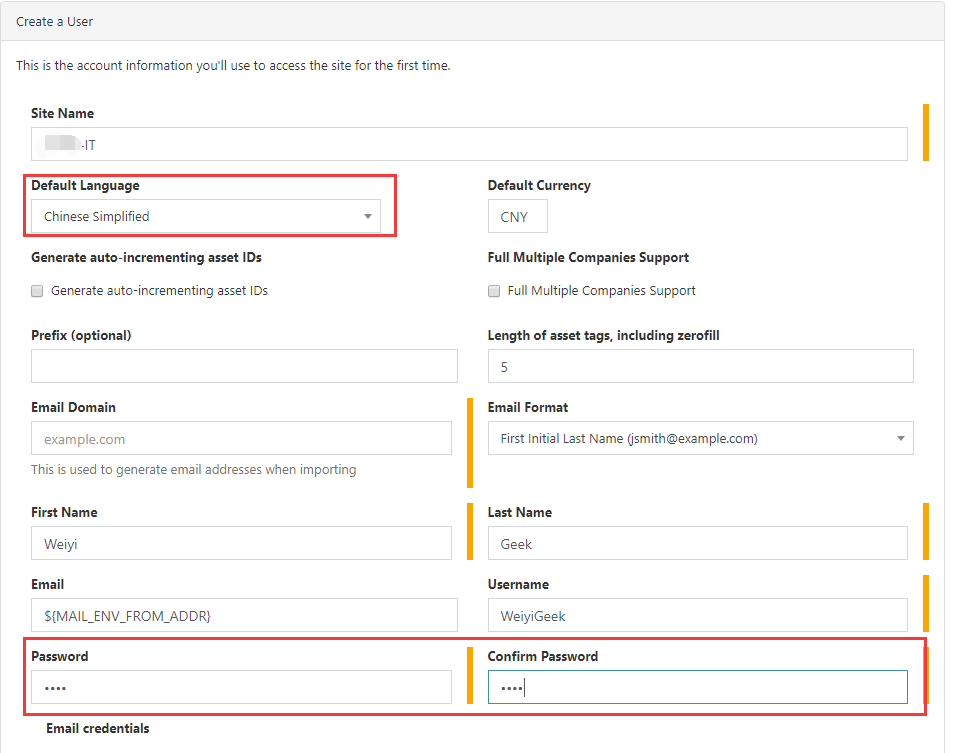
创建用户信息完成保存后即可完成并登陆到仪表台
weiyigeek.top-
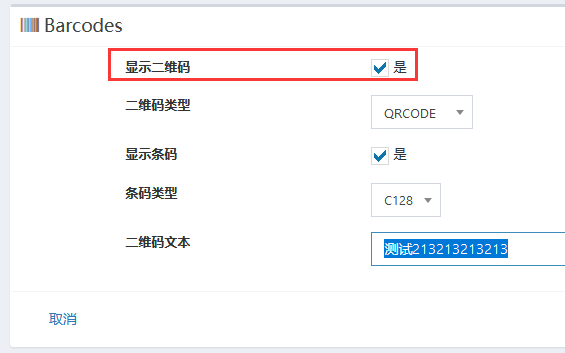
5.基础使用 (1) 二维码显示设置
weiyigeek.top-
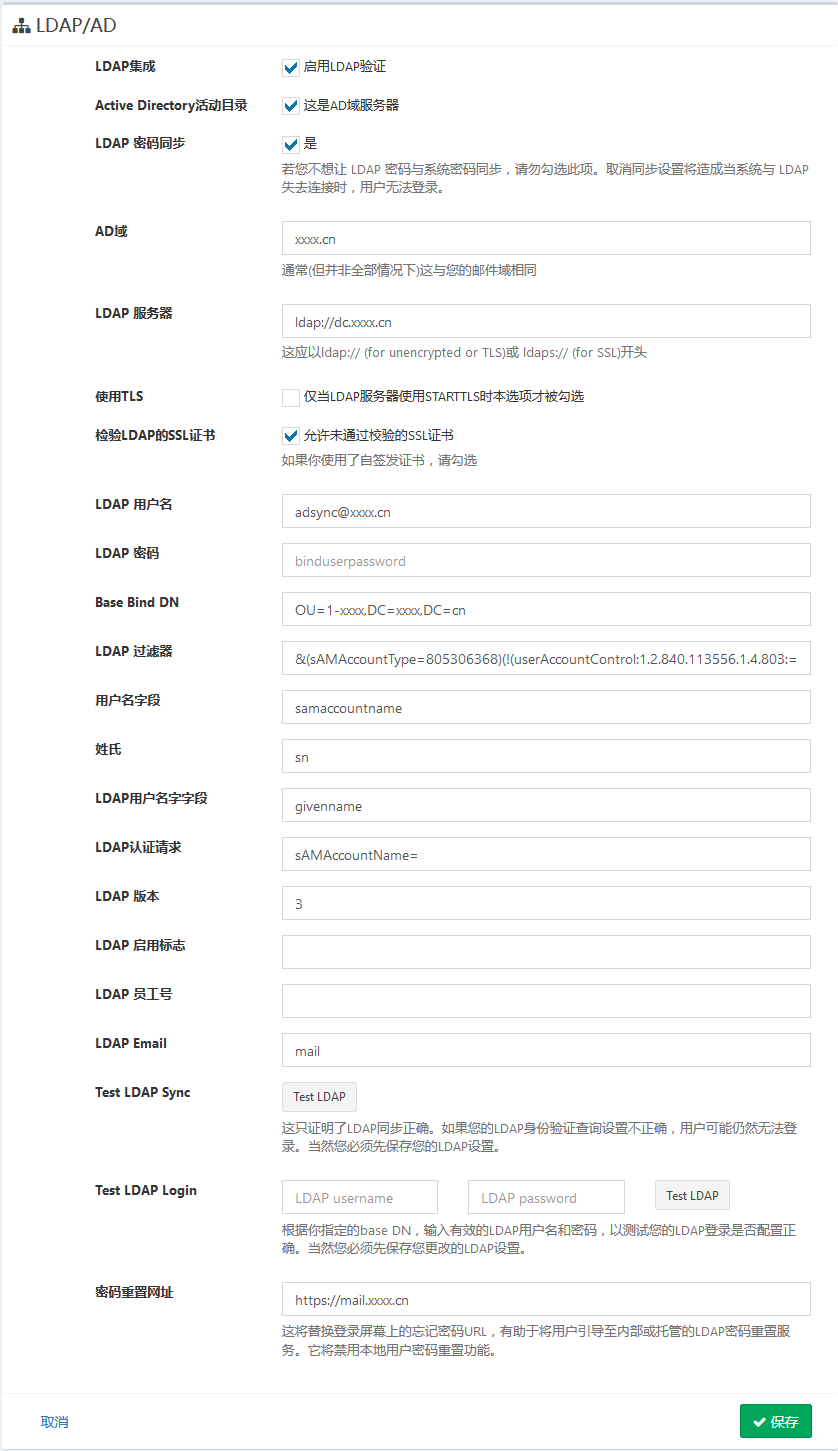
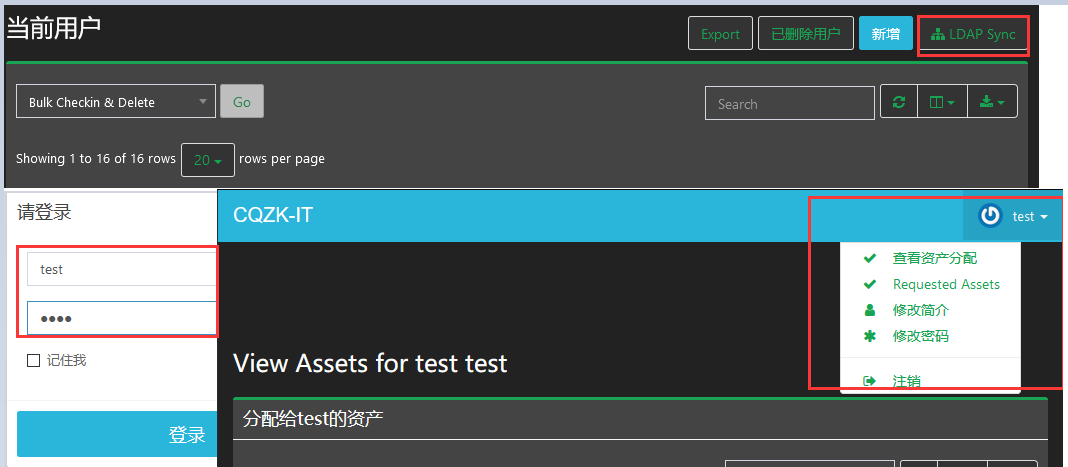
(2)LDAP同步设置 1 2 3 4 5 6 &(sAMAccountType=805306368)(!(userAccountControl:1.2.840.113556.1.4.803:=2)) vim /etc/crontab 0 */3 * * * /usr/local /php/bin/php /data/http/html/snipeit/artisan snipeit:ldap-sync >> /dev/null 2>&1 //每三个小时执行一次
weiyigeek.top-
(3)数据库备份 1 2 3 4 5 6 7 root@44dc40312522:/var/www/html/storage/app total 4.0K drwxr-xr-x 1 docker root 39 Nov 9 01:15 . drwxr-xr-x 1 docker root 46 Nov 9 01:15 .. -rwxr-xr-x 1 docker root 23 Nov 9 01:04 .gitignore lrwxrwxrwx 1 docker root 22 Nov 9 01:15 backups -> /var/lib/snipeit/dumps root@44dc40312522:/var/www/html/storage/app
4.进阶配置 OpenLDAP登录Snipe-IT配置 1 2 3 Snipe-IT version v4.9.0 build 4210 (g8b2f8ef3c) PHP版本 7.1.33-12+ubuntu16.04.1+deb.sury.org+1 Laravel版本 5.5.48
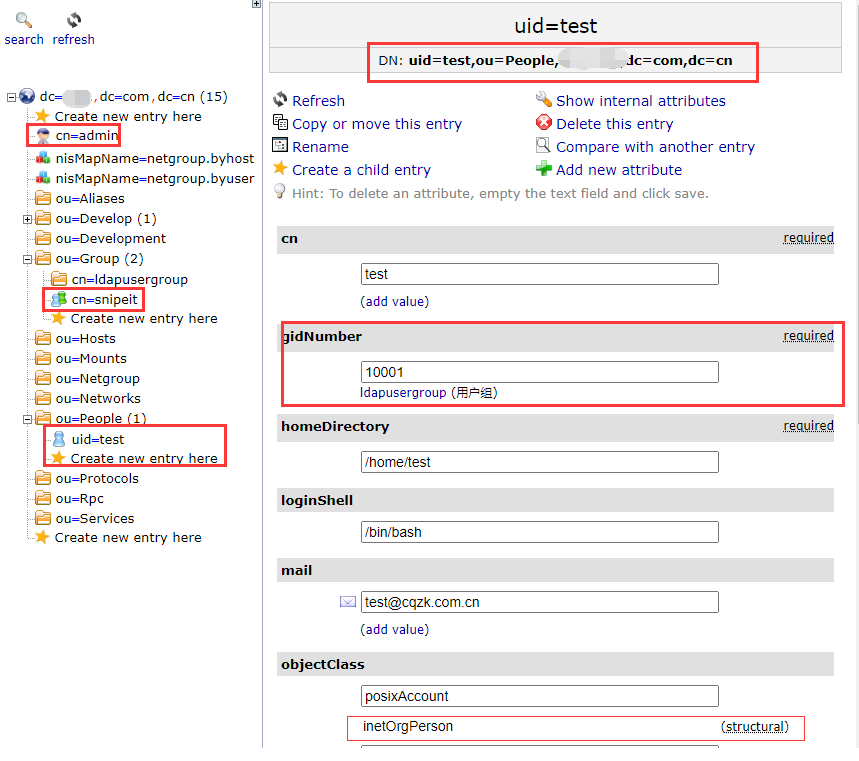
Setting -> LDAP/Active Directory 配置如下,官网ldap-sync-login配置参考:https://snipe-it.readme.io/docs/ldap-sync-login1 2 3 4 5 6 7 8 9 10 11 12 13 LDAP集成: 启用LDAP验证 LDAP密码同步: 可选 LDAP 服务器: ldap://127.0.0.1 LDAP 用户名: cn=weiyi,geek,dc=com,dc=cn LDAP 密码: password Base Bind DN: ou=People,dc=geek,dc=com,dc=cn LDAP 过滤器: &(objectclass=inetOrgPerson)(memberof=cn=snipeit,ou=Group,dc=geek,dc=com,dc=cn) 用户名字段: uid 姓氏: sn LDAP用户名字字段:cn LDAP认证请求:uid= LDAP 版本: 3 LDAP Email: mail
openldap服务创建配置如下:
weiyigeek.top-
补充由于版本适用于AD的LDAP,此时需要对ldap.php文件进行修改1 2 3 4 5 6 7 8 9 10 11 12 13 14 15 16 @@ -98 ,8 +98 ,10 @@ if (!$ldapbind = @ldap_bind($connection, $userDn, $password)) { return false ; } else { if (!$ldapbind = Ldap::bindAdminToLdap($connection)){ return false ; } } @@ -148 ,7 +150 ,7 @@ if (!$ldapbind = @ldap_bind($connection, $ldap_username, $ldap_pass)) { throw new Exception ('Could not bind to LDAP: ' .ldap_error($connection)); } return $ldapbind; }
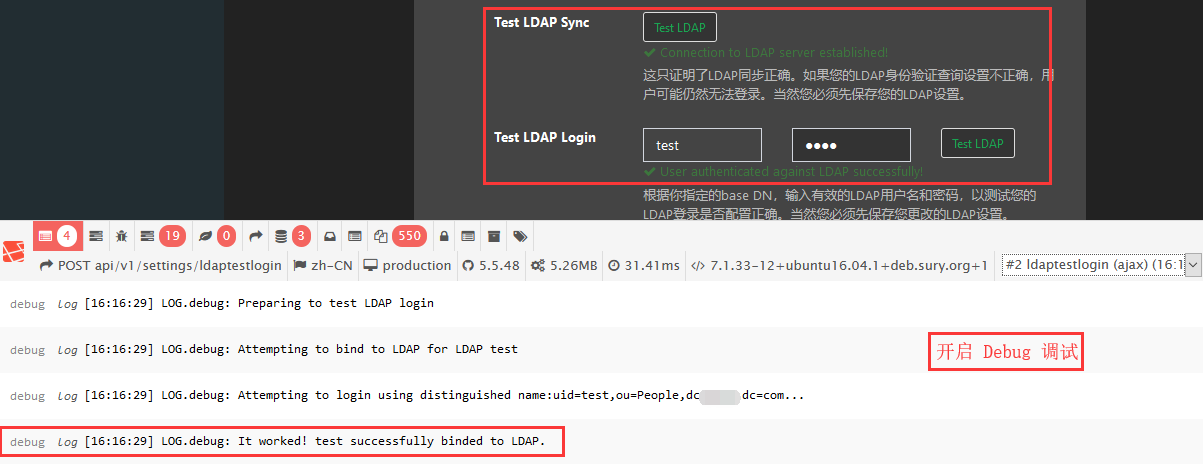
然后重启snipeit容器测试LDAP登录连接:
weiyigeek.top-
1 2 3 4 5 docker exec -it snipe-it1 php artisan snipeit:ldap-sync --location="LDAP" --summary docker exec -it snipe-it1 php artisan snipeit:disable
weiyigeek.top-LDAP登录
补充知识:
(1) Windows AD 域 LDAP过滤器完整格式 &(sAMAccountType=805306368)(!(userAccountControl:1.2.840.113556.1.4.803:=2))
(2) SnipeIT 定时同步 0 */3 * * * /usr/local/php/bin/php /data/http/html/snipeit/artisan snipeit:ldap-sync >> /dev/null 2>&1 //每三个小时执行一次
weiyigeek.top-AD-LDAP
(3) Snipe-IT BackUP 可以在页面上进行备份也可以采用命令行工具进行备份,实际上是创建数据库的SQL转储以及任何图像以及文件附件;1 php artisan snipeit:backup
5.后续升级 常规安装升级
1.备份程序目录1 mv /data/http/html/snipe-it/ /data/http/html/snipe-it_bakxxxxxxxx/
2.解压新版本到/data/http/html/snipe-it目录1 2 3 tar -zxvf snipe-it-4.5.0.tar.gz -C /data/http/html/ cd /data/http/html/mv snipe-it-4.5.0/ snipe-it
3.拷贝旧程序的配置文件至新目录并授权1 2 3 4 5 6 7 8 9 cp -R snipe-it-backup/public/uploads/* snipe-it/public/uploads cp -R snipe-it-backup/storage/private_uploads/* snipe-it/storage/private_uploads cp -R snipe-it-backup/storage/app/backups/* snipe-it/storage/app/backups cp -R snipe-it-backup/.env snipe-it/ cp -R snipe-it-backup/storage/oauth-private.key snipe-it/storage/oauth-private.key cp -R snipe-it-backup/storage/oauth-public.key snipe-it/storage/oauth-public.key chown -R apache:apaches snipe-it/ chmod -R 775 snipe-it/
4.重新执行Composer安装1 2 3 4 5 6 cd snipe-it/curl -sS https://getcomposer.org/installer | php php composer.phar install --prefer-source php composer.phar dump-autoloa php artisan migrate
5.清除缓存1 2 php artisan config:clear php artisan config:cache
Docker安装升级 https://snipe-it.readme.io/docs/docker
数据库迁移:1 2 3 CREATE DATABASE snipeit; CREATE USER 'snipeit' @'%' IDENDIFIED BY '123456' ; GRANT all ON snipeit.* TO 'snipeit' @'%' WITH GRANT OPTION;
0x02 CLPI 安装流程 CMDB系统: abbr. 配置管理数据库(Configuration Management Database)https://glpi-project.org/
1 2 3 git clone https://github.com/luckman666/deploy_glpi.git cd deploy_glpidocker-compose up -d
访问进行:http://10.10.10.10:8081/install/install.php 进行安装CLPI流程
weiyigeek.top-
weiyigeek.top-
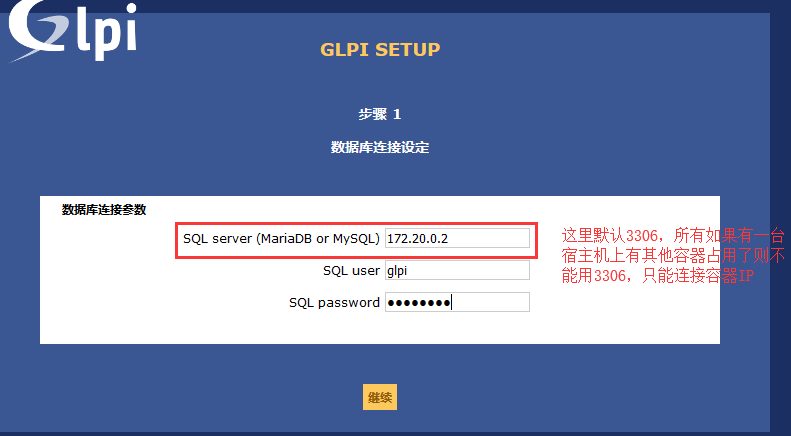
数据库设置(注意这里采用低权限的用户):
weiyigeek.top-
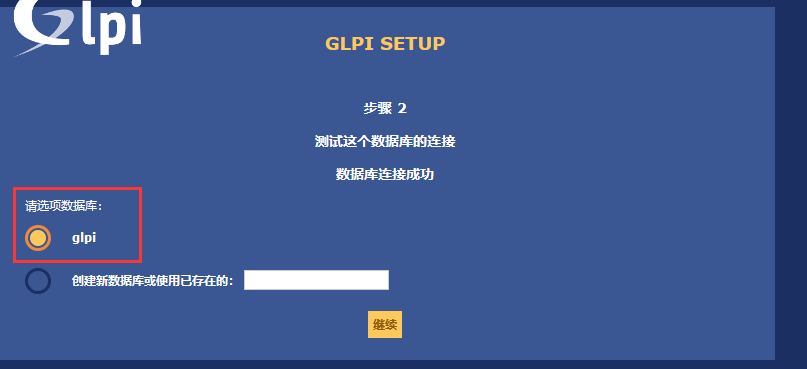
选择我们创建的数据库(glpi):
weiyigeek.top-
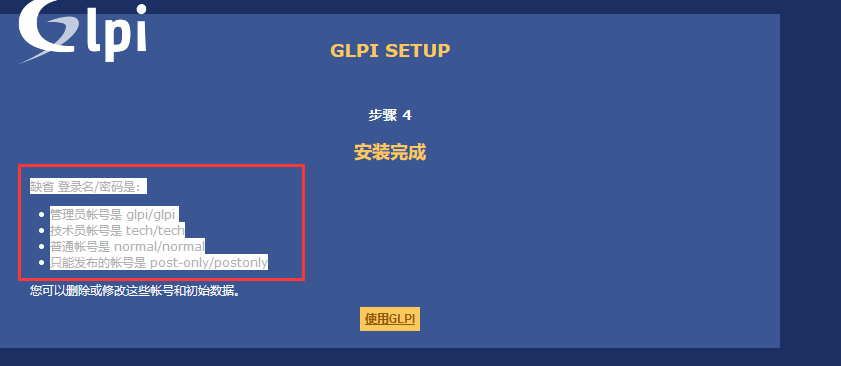
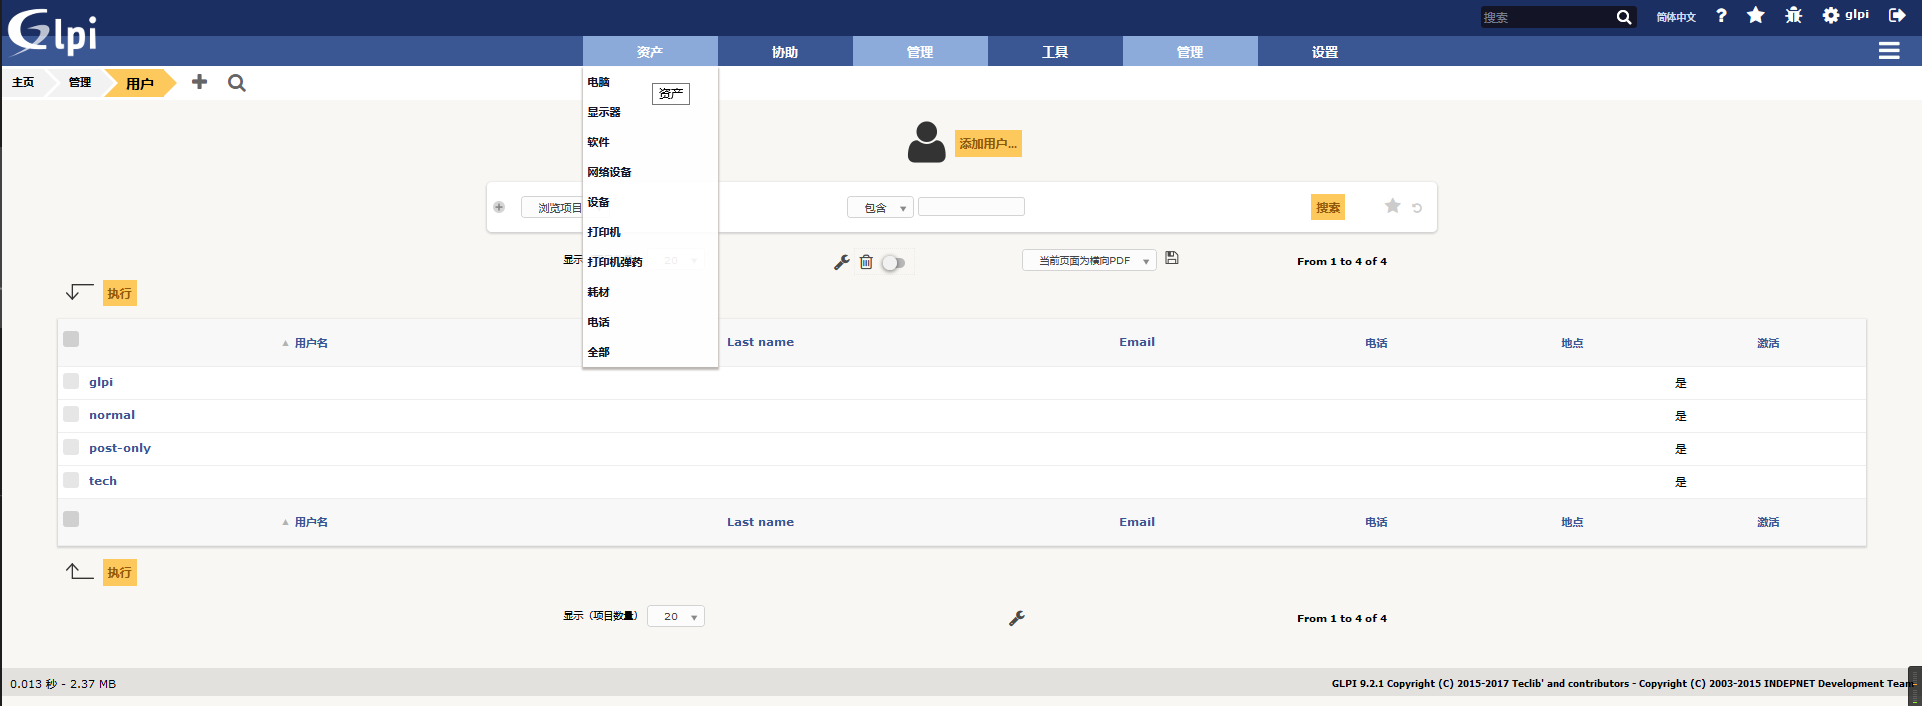
直接下一步,直到显示 缺省 登录名/密码是:1 2 3 4 管理员帐号是 glpi/glpi 技术员帐号是 tech/tech 普通帐号是 normal/normal 只能发布的帐号是 post-only/postonly
weiyigeek.top-
登录后主界面:
weiyigeek.top-
注意事项:
为了安全,请更改默认用户glpi post-only tech normal 的密码
为了安全,请删除文件:install/install.php

