[TOC]
0x00 rpm介绍 RPM全称是 Red Hat Package Manager(Red Hat包管理器-红帽创建的一个开放的软件包管理系统)。几乎所有的 Linux 发行版本都使用这种形式的软件包管理安装、更新和卸载软件,现在已成为一种标准,常用在opensuse/turbo/redhat版本,
RPM软件包中的文件是以压缩格式存放的,拥有一个定制的二进制头文件,其中包含有关包和内容的信息,可以让我们对单个软件包的查询简便又快速。
rmp包的特点:
拥有功能强大的查询选项
拥有能进行软件包的验证选项
rpm包优缺点 :
优点:包管理系统简单(通过命令实现包的安装、卸载、升级、查询、和验证),安装速度比源码包快
缺点:经过编译不能看见源代码,功能选择不如源码灵活,依赖性;
采用定制rpm包存放到yum仓库中并进行yum安装:
优点:可以根据自己的需求编译软件>>制作 rpm 包>>搭建 yum 仓库>>上传 rpm 包到 yum仓库>>客户端安装软件
缺点:第一步编译安装复杂,打包完成以后无法更改,一般人不会这个方法
RPM包存在的依赖性:装A前要装B,装B前要装C,比如window装游戏要显卡驱动 .net 的依赖;
[TOC]
0x00 rpm介绍 RPM全称是 Red Hat Package Manager(Red Hat包管理器-红帽创建的一个开放的软件包管理系统)。几乎所有的 Linux 发行版本都使用这种形式的软件包管理安装、更新和卸载软件,现在已成为一种标准,常用在opensuse/turbo/redhat版本,
RPM软件包中的文件是以压缩格式存放的,拥有一个定制的二进制头文件,其中包含有关包和内容的信息,可以让我们对单个软件包的查询简便又快速。
rmp包的特点:
拥有功能强大的查询选项
拥有能进行软件包的验证选项
rpm包优缺点 :
优点:包管理系统简单(通过命令实现包的安装、卸载、升级、查询、和验证),安装速度比源码包快
缺点:经过编译不能看见源代码,功能选择不如源码灵活,依赖性;
采用定制rpm包存放到yum仓库中并进行yum安装:
优点:可以根据自己的需求编译软件>>制作 rpm 包>>搭建 yum 仓库>>上传 rpm 包到 yum仓库>>客户端安装软件
缺点:第一步编译安装复杂,打包完成以后无法更改,一般人不会这个方法
RPM包存在的依赖性:装A前要装B,装B前要装C,比如window装游戏要显卡驱动 .net 的依赖;1 2 3 4 5 6 - 树形依赖 - 环形依赖 - 模块依赖 模块依赖的的文件名是以.so.2结尾的时候,代表这是一个文件,而不是一个软件包此时是模块依赖,需要依赖一个库文件。 这个时候就要上 www.rpmfind.net https://pkgs.org/ 网上去查找这一库文件是在那一个软件包下然后再把这个软件包安装上
RPM包命名规则:httpd-2.2.15-15.el6.centos.1.i686.rpm1 2 3 4 5 6 -httpd软件包名 -2.2.15软件版本号 -15 软件发布次数 -el6.centos 适合的Linux平台 -i686 适合的硬件平台 -rpm 扩展名
源码包和RPM包的区别:
安装之前的区别:概念上的区别
安装之后的区别:安装位置不同,rpm也可以指定安装目录,rpm包安装的服务可以使用系统服务管理命令(service)来管理
包全名与包名 :
包全名:操作的包是没有安装的软件包时,使用包全名如httpd-2.2.15-15.el6.centos.1.i686.rpm
包名: 操作一景安装的软件包时,使用包名,是收索/var/lib/rpm/中的数据库如httpd
注:未安装的包都要使用包全名,已安装的包只使用包名。
0x01 命令一览 1. rpm命令 rpm包安装的服务可以使用系统服务管理命令(service)来管理,RPM有五种基本的操作功能:安装、卸载、升级、查询和验证。例如RPM包安装的apache启动方法:
1 2 3 /etc/rc.d/init.d/httpd start service httpd start
RPM包默认安装位置:1 2 3 4 5 6 7 8 9 /etc/ 配置文件安装目录 /etc/sysconfig/ 初始化环境配置文件位置 /etc/init.d/ 启动脚本位置 /usr/bin/ 可执行的命令安装目录 /usr/lib/ 程序所使用的函数库保存位置 /usr/share/doc/ 基本的软件使用手册保存位置 /usr/share/man/ 帮助文件保存位置 /var/lib/ 服务产生数据 库文件存放位置 /var/log 日志
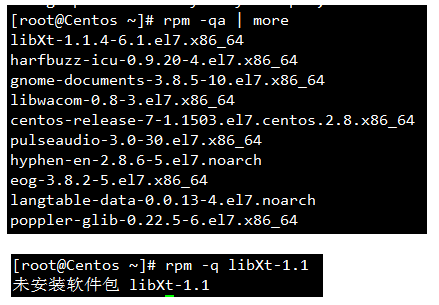
常用命令:1 2 3 4 5 6 7 8 9 10 11 12 13 14 15 16 17 18 19 20 21 22 23 24 25 26 27 28 29 30 31 32 33 34 35 36 37 38 39 rpm -ivh [包全名] rpm -Uvh [包全名] rpm -e 包名 rpm -q 包名 rpm -qa rpm -qi 包名 rpm -qip 包全名 rpm -ql 包名 rpm -qlp 包全名 rpm -qf [路径/文件名] rpm -qR 包名 rpm -qRp 包全名 rpm -V [已安装的包名] rpm ---prefix=<dir> -i (install) 安装 -U (upgrade) 升级 -e (erase) 卸载 -a (all) 所有包需要和-q联合使用 -q (--query)查询是否安装 -i 查询软件信息 -f 查询系统文件属于哪个软件包 -R 查询软件包的依赖性 -l 查询包安装位置列表 -p 查询未安装软件包的详细信息 package(必须进入光盘里面看包名信息) -v (verbose) 显示详细信息 -V (--verify)校验指定RPM包的文件 -h (hash ) 显示进度 --nodeps 不监测依赖性
weiyigeek.top-rpm
实例演示:1 2 3 4 5 6 7 8 9 10 11 12 13 14 15 16 17 18 19 20 21 22 23 24 25 26 27 28 29 30 31 32 33 34 35 36 37 38 39 40 41 42 43 44 45 46 47 48 49 50 51 52 53 54 55 56 57 58 59 60 61 [root@izwz9biz2m4sd3bb3k38pgz ~]$ rpm -q httpd httpd-2.4.6-88.el7.centos.x86_64 [root@izwz9biz2m4sd3bb3k38pgz ~]$ rpm -qa | grep "httpd" httpd-2.4.6-88.el7.centos.x86_64 httpd-manual-2.4.6-88.el7.centos.noarch httpd-tools-2.4.6-88.el7.centos.x86_64 [root@izwz9biz2m4sd3bb3k38pgz ~]$ rpm -qi httpd Name : httpd Version : 2.4.6 Release : 88.el7.centos Architecture: x86_64 Install Date: Tue 26 Feb 2019 08:56:24 PM CST Group : System Environment/Daemons Size : 9817309 License : ASL 2.0 Signature : RSA/SHA256, Mon 12 Nov 2018 10:28:53 PM CST, Key ID 24c6a8a7f4a80eb5 Source RPM : httpd-2.4.6-88.el7.centos.src.rpm Build Date : Mon 05 Nov 2018 09:48:57 AM CST Build Host : x86-01.bsys.centos.org Relocations : (not relocatable) Packager : CentOS BuildSystem <http://bugs.centos.org> Vendor : CentOS URL : http://httpd.apache.org/ Summary : Apache HTTP Server Description : The Apache HTTP Server is a powerful, efficient, and extensible web server. $ rpm -ql httpd /etc/httpd /etc/httpd/conf /etc/httpd/conf.d /etc/httpd/conf.d/README /etc/httpd/conf.d/autoindex.conf $ rpm -qf /etc/httpd/conf/httpd.conf httpd-2.4.6-88.el7.centos.x86_64 $ rpm -V httpd missing c /etc/httpd/conf.d/welcome.conf .......T. c /etc/httpd/conf/httpd.conf S 文件大小是否该表 M 文件类型或文件的权限(rwx)是否被改变 5 文件MD5校验和是否改变 D 设备的主从代码是否改变 L 文件路径是否改变 U 文件的属主是否改变 G 文件的属组是否改变 T 文件的修改时间是否改变 c 配置文件 d 普通文档 g 鬼文件,很少见,就是该文件不应该被这个RPM包包含 L 授权文件 r 描述文件
实际案例:1 2 3 4 5 6 7 8 9 10 11 12 13 14 15 16 17 18 19 20 21 yum -y localinstall *.rpm rpm -ivh nginx-1.6.3-1.x86_64.rpm rpm -ivh rubygems-1.3.7-5.el6.noarch.rpm --nodeps rpm -Uvh *.rpm man rpm rpm -qpi nginx-1.6.3-1.x86_64.rpm rpm -qpl nginx-1.6.3-1.x86_64.rpm rpm -qpR nginx-1.6.3-1.x86_64.rpm rpm -qp --scripts nginx-1.6.3-1.x86_64.rpm rpm -ivh --aid *.rpm rpm -ev nginx-1.6.3-1.x86_64.rpm rpm -e --nodeps nginx-1.6.3-1.x86_64.rpm
2. 文件提取 cpio是一个标准工具它用于创建软件档案和从档案文件中提取文件1 2 3 4 5 rpm2cpio 包全名 | cpio -idv .文件绝对路径 cpio 选项 <[文件][设备]> -i copy-in 模式 还原 -d 还原时自动新建目录 -v 显示还原过程
使用案例:1 2 3 4 5 6 $rpm -qf /bin/ls coreutils-8.22-23.el7.x86_64 $mv /bin/ls /tmp/ rpm2cpio /mnt/cdrom/Packages/coreutils-8.22-23.el7.x86_64.rpm | cpio -idv ./bin/ls cp /root/bin/ls /bin/
0x02 rpm定制与应用 rpmbuild 是 redhat 系统原生打包命令,这个命令的使用复杂不推荐使用此方法打包 rpm 包;
问题:当领导给你 100 台已经安装好系统的服务器,然后让优化,让你提出一个快速部署方案
1. spec文件规范 制作RPM软件包其中的关键在于编写SPEC软件包描述文件,该文件中包含了软件包的诸多信息;
描述文件说明如下:1 2 3 4 5 6 7 8 9 10 11 12 13 14 15 16 17 18 19 20 21 22 23 24 25 26 27 28 29 30 31 32 33 34 35 36 37 38 39 40 41 42 43 44 45 46 47 48 49 50 51 52 53 54 55 56 57 58 59 60 61 62 63 64 65 66 67 68 69 70 (1) 文件头 $rpm -qi httpd Name : httpd Version : 2.4.6 Release : 88.el7.centos Architecture: x86_64 Install Date: Tue 26 Feb 2019 08:56:24 PM CST Group : System Environment/Daemons Size : 9817309 License : ASL 2.0 Signature : RSA/SHA256, Mon 12 Nov 2018 10:28:53 PM CST, Key ID 24c6a8a7f4a80eb5 Source RPM : httpd-2.4.6-88.el7.centos.src.rpm Build Date : Mon 05 Nov 2018 09:48:57 AM CST Build Host : x86-01.bsys.centos.org Relocations : (not relocatable) Packager : CentOS BuildSystem <http://bugs.centos.org> Vendor : CentOS URL : http://httpd.apache.org/ Summary : Apache HTTP Server Description : The Apache HTTP Server is a powerful, efficient, and extensible web server. Amusements/Games (娱乐/游戏) Amusements/Graphics(娱乐/图形) Applications/Archiving (应用/文档) Applications/Communications(应用/通讯) Applications/Databases (应用/数据库) Applications/Editors (应用/编辑器) Applications/Emulators (应用/仿真器) Applications/Engineering (应用/工程) Applications/File (应用/文件) Applications/Internet (应用/因特网) Applications/Multimedia(应用/多媒体) Applications/Productivity (应用/产品) Applications/Publishing(应用/印刷) Applications/System(应用/系统) Applications/Text (应用/文本) Development/Debuggers (开发/调试器) Development/Languages (开发/语言) Development/Libraries (开发/函数库) Development/System (开发/系统) Development/Tools (开发/工具) Documentation (文档) System Environment/Base(系统环境/基础) System Environment/Daemons (系统环境/守护) System Environment/Kernel (系统环境/内核) System Environment/Libraries (系统环境/函数库) System Environment/Shells (系统环境/接口) User Interface/Desktops(用户界面/桌面) User Interface/X (用户界面/X窗口) User Interface/X Hardware Support (用户界面/X硬件支持) (2)%prep段 :预处理 段通常用来执行一些解开源程序包的命令为下一步的编译安装作准备。 %prep和下面的%build,%install段一样,除了可以执行RPM所定义的宏命令(以%开头)以外,还可以执行SHELL命令,命令可以有很多行,如我们常写的tar解包命令。 (3)%build段:建立段 所要执行的命令为生成软件包服务如make 命令。 (4)%install段:安装段 其中的命令在安装软件包时将执行如make install命令。 (5)%files段:文件段 用于定义软件包所包含的文件分为三类--说明文档(doc)/配置文件(config)及执行程序还可定义文件存取权限拥有者及组别。 (6)%changelog段: 修改日志段。你可以将软件的每次修改记录到这里,保存到发布的软件包中,以便查询之用。每一个修改日志都有这样一种格式:第一行是:* 星期 月 日 年 修改人 电子信箱。其中:星期、月份均用英文形式的前3个字母,用中文会报错。接下来的行写的是修改了什么地方,可写多行。一般以减号开始,便于后续的查阅。
2. rpmbuild编译目录 如果想发布rpm格式的源码包或者是二进制包,就要使用rpmbuild工具(rpm最新打包工具), 其标准命名格式为:软件名-版本号-释出号.spec
在redhat下安装成功后会在在/usr/src/redhat/目录下建立6个目录,它门分别是BUILD、SOURCE、SPECS 、RPMS 、SRPMS 、 BuiltRoot ;
BUILD :源代码解压以后放的位置(由rpmbuild管理)- 解压的程序源代码编译文件存储目录
SOURCE:用来存放打包是要用到的源文件和补丁文件等存放位置 - 脚本存放目录
SPEC:存放spec文件作为制作rpm包的领岗文件以 rpm名.spec
RPMS:用来制作完成后的rpm包存放目录,为特定平台指定子目录(i386,i686,ppc) - rpms生成目录
SRPMS:分别存放打包生成的rpm格式的源文件和二进制文件
BuiltRoot:使用install临时安装到这个目录把这个目录当作根来用的 - 当打包完成后在清理目录将被删除;
注意:在centos没有该目录,因此我们需要自定义工作车间一般自定义到普通用户的家目录下;
0x03 rpm打包环境 0. rpmbuild环境安装 1 2 3 4 5 6 7 8 9 10 11 12 13 14 15 16 17 18 19 20 21 22 yum -y install rpm-build yum -y install gcc gcc-c++ kernel-devel make yum install rpm-sign useradd urpm & su - urpm $ vim ~/.rpmmacros %_topdir /home/urpm/rpmbuild %_gpg_name weiyigeek mkdir -pv ~/rpmbuild/{BUILD,BUILDROOT,RPMS,SOURCES,SPECS,SRPMS} rpmbuild --showrc | grep _topdir 一个下划线:定义环境的使用情况 二个下划线:通常定义的是命令
weiyigeek.top-自定义车间位置
为什么要定义宏?
1. rpmbuild命令介绍 常见得命令是:1 2 3 4 5 6 7 8 rpmbuild -bp xxx.spec rpmbuild -bc nginx.spec rpmbuild -bi nginx.spec rpmbuild -bs xxx.spec rpmbuild -bb xxx.spec rpmbuild -ba xxx.spec
典型spec文件分析:kaffeine.spec(kaffeine是linux平台下的媒体播放器)1 2 3 4 5 6 7 8 9 10 11 12 13 14 15 16 17 18 19 20 %define debug_package %{nil} Name: kaffeine Version: 0.4.3 Release: 25 Summary: A xine-based Media Player for KDE Group: Applications/Multimedia License: GPL URL: http://kaffeine.sourceforge.net/ Source0: kaffeine-0.4.3.tar.bz2 Source1: logo.png Source2: icon.tgz Source3: kaffeine.desktop Source4: codecs.tgz Patch: kaffeine-0.4.3-fix-hide-crash.patch Patch1:kaffeine-0.4.3-without-wizard.patch BuildRoot: /var/tmp/kaffeine-root %description Kaffeine is a xine based media player for KDE3.
核心部分:涉及到解包、补丁、编译、安装的过程,1 2 3 4 5 6 7 8 9 10 11 12 13 14 15 16 17 18 19 20 21 22 23 24 25 26 27 28 29 30 31 32 33 34 35 36 37 38 39 40 41 42 43 44 45 46 47 48 49 50 51 52 %prep %setup -q %patch -p1 %patch1 -p1 %Build make -f admin/Makefile.common cvs ./configure --prefix=/usr make pushd porm *.gmo make popd %install mkdir -p $RPM_BUILD_ROOT make install DESTDIR=$RPM_BUILD_ROOT mkdir -p $RPM_BUILD_ROOT /usr/share/services cp $RPM_BUILD_ROOT /usr/share/apps/kaffeine/mms.protocol $RPM_BUILD_ROOT /usr/share/services cp $RPM_BUILD_ROOT /usr/share/apps/kaffeine/rtsp.protocol $RPM_BUILD_ROOT /usr/share/services $RPM_BUILD_ROOT /usr/lib/firefox/pluginscp %{SOURCE1} $RPM_BUILD_ROOT /usr/share/apps/kaffeine rm -rf $RPM_BUILD_ROOT /usr/share/icons/hicolor/*/apps/kaffeine.png rm -rf $RPM_BUILD_ROOT /usr/share/icons/hicolor/*/apps/kaffeine-pause.png rm -rf $RPM_BUILD_ROOT /usr/share/icons/hicolor/*/apps/kaffeine-play.png rm -rf $RPM_BUILD_ROOT /usr/share/icons/hicolor/*/apps/kaffeine-record.png mkdir -p $RPM_BUILD_ROOT /usr/share/icons/crystalsvg tar zxvf %{SOURCE2} -C $RPM_BUILD_ROOT /usr/share/icons/crystalsvg mkdir -p $RPM_BUILD_ROOT /usr/share/applnk/App/Multimedia cp -r %{SOURCE3} $RPM_BUILD_ROOT /usr/share/applnk/App/Multimedia mkdir -p $RPM_BUILD_ROOT /usr/lib/win32 tar zxvf %{SOURCE4} -C $RPM_BUILD_ROOT /usr/lib/win32 %clean rm -rf $RPM_BUILD_ROOT %post ln -s /dev/cdrom /dev/dvd ln -s /dev/cdrom /dev/rdvd %files %defattr(-,root,root) /usr %changelog * Fri Jul 1 2005 AiLin Yang <alyang@redflag-linux.com> -0.4.3-25 - modified the fullscreen bottom control panel
2. 实际案例 CentOS下使用rpm-build制作nginx的RPM包 1 2 3 4 wget http://nginx.org/download/nginx-1.16.0.tar.gz cp nginx-1.16.0.tar.gz rpmbuild/SOURCES/ touch fastcgi_params init.nginx nginx.conf
step2.编辑init.nginx1 2 3 4 5 6 7 8 9 10 11 12 13 14 15 16 17 18 19 20 21 22 23 24 25 26 27 28 29 30 31 32 33 34 35 36 37 38 39 40 41 42 43 44 45 46 47 48 49 50 51 52 53 54 55 56 57 58 59 60 61 62 63 64 65 66 67 68 69 70 71 72 73 74 75 76 77 78 79 80 81 82 83 84 85 86 87 88 89 90 91 92 93 94 95 96 97 98 99 100 101 102 103 104 105 106 107 108 109 110 111 112 113 #!/bin/sh . /etc/rc.d/init.d/functions . /etc/sysconfig/network [ "$NETWORKING " = "no" ] && exit 0 nginx="/usr/local/nginx/sbin/nginx" prog=$(basename $nginx ) NGINX_CONF_FILE="/usr/local/nginx/conf/nginx.conf" [ -f /etc/sysconfig/nginx ] && . /etc/sysconfig/nginx lockfile=/var/lock/subsys/nginx make_dirs user=`nginx -V 2>&1 | grep "configure arguments:" | sed 's/[^*]*--user=\([^ ]*\).*/\1/g' -` options=`$nginx -V 2>&1 | grep 'configure arguments:' ` for opt in $options ; do if [ `echo $opt | grep '.*-temp-path' ` ]; then value=`echo $opt | cut -d "=" -f 2` if [ ! -d "$value " ]; then mkdir -p $value && chown -R $user $value fi fi done } start [ -x $nginx ] || exit 5 [ -f $NGINX_CONF_FILE ] || exit 6 make_dirs echo -n $"Starting $prog : " daemon $nginx -c $NGINX_CONF_FILE retval=$? echo [ $retval -eq 0 ] && touch $lockfile return $retval } stop echo -n $"Stopping $prog : " killproc $prog -QUIT retval=$? echo [ $retval -eq 0 ] && rm -f $lockfile return $retval } restart configtest || return $? stop sleep 1 start } reload configtest || return $? echo -n $"Reloading $prog : " killproc $nginx -HUP RETVAL=$? echo } force_reload restart } configtest $nginx -t -c $NGINX_CONF_FILE } rh_status status $prog } rh_status_q rh_status >/dev/null 2>&1 } case "$1 " in start) rh_status_q && exit 0 $1 ;; stop) rh_status_q || exit 0 $1 ;; restart|configtest) $1 ;; reload) rh_status_q || exit 7 $1 ;; force-reload) force_reload ;; status) rh_status ;; condrestart|try-restart) rh_status_q || exit 0 ;; *) echo $"Usage: $0 {start|stop|status|restart|condrestart|try-restart|reload|force-reload|configtest}" exit 2 esac
step3.fastcgi_params参数1 2 3 4 5 6 7 8 9 10 11 12 13 14 15 16 17 fastcgi_param GATEWAY_INTERFACE CGI/1.1; fastcgi_param SERVER_SOFTWARE nginx; fastcgi_param QUERY_STRING $query_string ; fastcgi_param REQUEST_METHOD $request_method ; fastcgi_param CONTENT_TYPE $content_type ; fastcgi_param CONTENT_LENGTH $content_length ; fastcgi_param SCRIPT_FILENAME $document_root $fastcgi_script_name ; fastcgi_param SCRIPT_NAME $fastcgi_script_name ; fastcgi_param REQUEST_URI $request_uri ; fastcgi_param DOCUMENT_URI $document_uri ; fastcgi_param DOCUMENT_ROOT $document_root ; fastcgi_param SERVER_PROTOCOL $server_protocol ; fastcgi_param REMOTE_ADDR $remote_addr ; fastcgi_param REMOTE_PORT $remote_port ; fastcgi_param SERVER_ADDR $server_addr ; fastcgi_param SERVER_PORT $server_port ; fastcgi_param SERVER_NAME $server_name ;
Step4.编辑sepc文件进行RPM包基本配置(重重之中-注意备注里面不能带有%+关键字)1 2 3 4 5 6 7 8 9 10 11 12 13 14 15 16 17 18 19 20 21 22 23 24 25 26 27 28 29 30 31 32 33 34 35 36 37 38 39 40 41 42 43 44 45 46 47 48 49 50 51 52 53 54 55 56 57 58 59 60 61 62 63 64 65 66 67 68 69 70 71 72 73 74 75 76 77 78 79 80 81 82 83 84 85 86 87 88 89 90 91 92 93 94 95 96 97 98 99 100 101 102 103 104 105 106 107 108 109 110 111 Name: nginx Version: 1.16.0 Release: 1%{?dist} Summary: nginx Porxy http server Group: Applications/Archiving License: GPLv2 URL: http://weiyigeek.github.io Packager: weiyigeek <weiyigeek@qq.com> Source0: %{name}-%{version}.tar.gz Source1: init.nginx Source2: fastcgi_params BuildRoot: %_topdir/BUILDROOT BuildRequires: gcc Requires: openssl,openssl-devel,pcre-devel,pcre %description Custom a rpm by yourself!Build nginx-1.16.0.tar.gz to nginx-1.16.0.rpm %prep %setup -q %build ./configure \ --prefix=/usr/local /nginx \ --user=nginx \ --group=nginx \ --with-http_ssl_module \ --with-http_stub_status_module \ --with-pcre make %{?_smp_mflags} %install rm -rf %{buildroot} make install DESTDIR=%{buildroot} %{__install} -p -D -m 0755 %{SOURCE1} %{buildroot}/etc/rc.d/init.d/nginx %{__install} -p -D %{SOURCE2} %{buildroot}/usr/local /nginx/conf/fastcgi_params %pre if [ $1 == 1 ];then /usr/sbin/useradd -M nginx -s /sbin/nologin 2> /dev/null ln -s /usr/local /nginx/sbin/nginx /usr/bin/nginx 2> /dev/null fi %preun if [ $1 == 0 ];then /usr/sbin/userdel -r nginx 2> /dev/null /usr/bin/rm -rf /usr/bin/nginx systemctl daemon-reload /etc/init.d/nginx stop > /dev/null 2>&1 fi %postun %clean rm -rf %{buildroot} rm -rf /var/tmp/rpm-tmp.* %files %defattr(-,root,root,0755) /usr/local /nginx/ %attr(0755,root,root) /etc/rc.d/init.d/nginx %config(noreplace) /usr/local /nginx/conf/nginx.conf %config(noreplace) /usr/local /nginx/conf/fastcgi_params %doc %changelog * Wed Jun 19 2019 weiyigeek <weiyigeek@qq.com> - 1.16.0-1 - Initial version and rpm Build
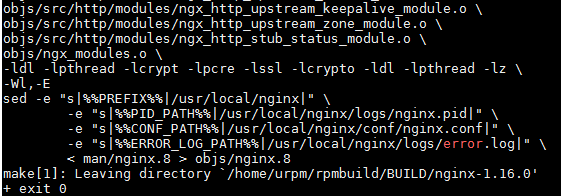
Step5.rpm打包编译流程开始演示 1 2 3 4 5 6 7 8 9 10 11 12 13 14 15 16 17 18 19 20 21 22 23 24 $rpmbuild -bp nginx.spec执行(%prep): /bin/sh -e /var/tmp/rpm-tmp.LdMAUu + umask 022 + cd /root/rpmbuild/BUILD + cd /root/rpmbuild/BUILD + rm -rf nginx-1.16.0 + /usr/bin/gzip -dc /root/rpmbuild/SOURCES/nginx-1.16.0.tar.gz + /usr/bin/tar -xf - + STATUS=0 + '[' 0 -ne 0 ']' + cd nginx-1.16.0 + /usr/bin/chmod -Rf a+rX,u+w,g-w,o-w . + exit 0 $rpmbuild -bc nginx.specsed -e "s|%%PREFIX%%|/usr/local/nginx|" \ -e "s|%%PID_PATH%%|/usr/local/nginx/logs/nginx.pid|" \ -e "s|%%CONF_PATH%%|/usr/local/nginx/conf/nginx.conf|" \ -e "s|%%ERROR_LOG_PATH%%|/usr/local/nginx/logs/error.log|" \ < man/nginx.8 > objs/nginx.8 make[1]: Leaving directory `/root/rpmbuild/BUILD/nginx-1.16.0' + exit 0
weiyigeek.top-build
1 2 3 4 5 6 7 8 9 10 11 12 13 14 15 16 17 18 $rpmbuild -bi nginx.spec处理文件:nginx-debuginfo-1.16.0-1.el7.x86_64 Provides: nginx-debuginfo = 1.16.0-1.el7 nginx-debuginfo(x86-64) = 1.16.0-1.el7 Requires(rpmlib): rpmlib(FileDigests) <= 4.6.0-1 rpmlib(PayloadFilesHavePrefix) <= 4.0-1 rpmlib(CompressedFileNames) <= 3.0.4-1 检查未打包文件:/usr/lib/rpm/check-files /root/rpmbuild/BUILDROOT/nginx-1.16.0-1.el7.x86_64 $rpmbuild -ba nginx.spec 检查未打包文件:/usr/lib/rpm/check-files /root/rpmbuild/BUILDROOT/nginx-1.16.0-1.el7.x86_64 写道:/root/rpmbuild/RPMS/x86_64/nginx-1.16.0-1.el7.x86_64.rpm 写道:/root/rpmbuild/RPMS/x86_64/nginx-debuginfo-1.16.0-1.el7.x86_64.rpm $ll /root/rpmbuild/SRPMS/nginx-1.16.0-1.el7.src.rpm -rw-r--r-- 1 root root 1037470 6月 20 09:08 /root/rpmbuild/SRPMS/nginx-1.16.0-1.el7.src.rpm $ll /root/rpmbuild/RPMS/x86_64/nginx-1.16.0-1.el7.x86_64.rpm -rw-r--r-- 1 root root 312800 6月 20 09:08 /root/rpmbuild/RPMS/x86_64/nginx-1.16.0-1.el7.x86_64.rpm
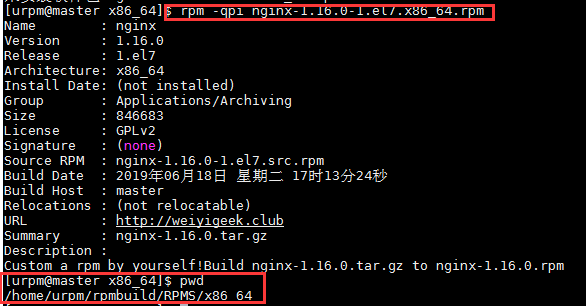
Step6.rpm打包成功查看打包信息1 2 3 4 5 6 7 8 9 10 11 12 13 14 15 16 17 18 19 rpm -qip /root/rpmbuild/RPMS/x86_64/nginx-1.16.0-1.el7.x86_64.rpm Name : nginx Version : 1.16.0 Release : 1.el7 Architecture: x86_64 Install Date: (not installed) Group : Applications/Archiving Size : 849363 License : GPLv2 Signature : RSA/SHA1, 2019年06月19日 星期三 13时16分30秒, Key ID 4a8eba8dd59c7bb6 Source RPM : nginx-1.16.0-1.el7.src.rpm Build Date : 2019年06月19日 星期三 13时08分12秒 Build Host : master Relocations : (not relocatable) Packager : weiyigeek <weiyigeek@qq.com> URL : http://weiyigeek.github.io Summary : nginx Porxy http server Description : Custom a rpm by yourself!Build nginx-1.16.0.tar.gz to nginx-1.16.0.rpm
weiyigeek.top-
Step7.为我们打包的rpm进行gpg签名1 2 3 4 5 6 7 8 9 10 11 12 13 14 15 16 17 18 19 20 21 22 23 24 25 26 27 28 29 30 31 32 33 34 35 36 37 38 39 40 41 42 43 44 45 46 47 48 49 50 51 52 53 54 55 56 $gpg --gen-keygpg: 已创建目录‘/root/.gnupg’ gpg: 新的配置文件‘/root/.gnupg/gpg.conf’已建立 gpg: 警告:在‘/root/.gnupg/gpg.conf’里的选项于此次运行期间未被使用 gpg: 钥匙环‘/root/.gnupg/secring.gpg’已建立 gpg: 钥匙环‘/root/.gnupg/pubring.gpg’已建立 请选择您要使用的密钥种类: (1) RSA and RSA (default) (2) DSA and Elgamal (3) DSA (仅用于签名) (4) RSA (仅用于签名) 您的选择? 1 RSA 密钥长度应在 1024 位与 4096 位之间。 您想要用多大的密钥尺寸?(2048)1024 您所要求的密钥尺寸是 1024 位 请设定这把密钥的有效期限。 0 = 密钥永不过期 <n> = 密钥在 n 天后过期 <n>w = 密钥在 n 周后过期 <n>m = 密钥在 n 月后过期 <n>y = 密钥在 n 年后过期 密钥的有效期限是?(0) 1y 密钥于 2020年06月18日 星期四 12时45分15秒 CST 过期 以上正确吗?(y/n)y ter) <heinrichh@duesseldorf.de> 真实姓名:weiyigeek 电子邮件地址:weiyigeek@qq.com 注释:Weiyigeek 您选定了这个用户标识: “weiyigeek (Weiyigeek) <weiyigeek@qq.com>” 更改姓名(N)、注释(C)、电子邮件地址(E)或确定(O)/退出(Q)?0 输入密匙密码: <ENTER> <Take this one anyway> <Enter> 在生成密钥的时候,会报这么一个信息:can't connect to `/root/.gnupg/S.gpg-agent' : No such file or directory,可以不用理会它。 $ngd -r /dev/urandom gpg: /root/.gnupg/trustdb.gpg:建立了信任度数据库 gpg: 密钥 D59C7BB6 被标记为绝对信任 公钥和私钥已经生成并经签名。 gpg: 正在检查信任度数据库 gpg: 需要 3 份勉强信任和 1 份完全信任,PGP 信任模型 gpg: 深度:0 有效性: 1 已签名: 0 信任度:0-,0q,0n,0m,0f,1u gpg: 下次信任度数据库检查将于 2020-06-18 进行 pub 1024R/D59C7BB6 2019-06-19 [有效至:2020-06-18] 密钥指纹 = 3C01 50EE C61A 3B1F CC55 63C1 4A8E BA8D D59C 7BB6 uid weiyigeek (test ) <weiyigeek@qq.com> sub 1024R/30AC729C 2019-06-19 [有效至:2020-06-18]
查看生成的密钥:1 2 3 4 5 6 7 8 9 10 11 12 13 14 15 16 17 18 19 20 21 22 23 24 25 26 $gpg --list-keys/root/.gnupg/pubring.gpg ------------------------ pub 1024R/D59C7BB6 2019-06-19 [有效至:2020-06-18] uid weiyigeek (test ) <weiyigeek@qq.com> sub 1024R/30AC729C 2019-06-19 [有效至:2020-06-18] $gpg --export -a "weiyigeek" > RPM-GPG-KEY-weiyigeek$vim ~/.rpmmacros%_gpg_name weiyigeek $rpm --resign /root/rpmbuild/RPMS/x86_64/nginx-1.16.0-1.el7.x86_64.rpm输入密码、密码正确。 /root/rpmbuild/RPMS/x86_64/nginx-1.16.0-1.el7.x86_64.rpm: $rpm --import RPM-GPG-KEY-weiyigeek$rpm --checksig /root/rpmbuild/RPMS/x86_64/nginx-1.16.0-1.el7.x86_64.rpm$rpm -K /root/rpmbuild/RPMS/x86_64/nginx-1.16.0-1.el7.x86_64.rpm/root/rpmbuild/RPMS/x86_64/nginx-1.16.0-1.el7.x86_64.rpm: rsa sha1 (md5) pgp md5 确定 (发现gpg)
重新安装nginx,验证安装包的签名信息:1 2 3 4 5 $rpm -ivh /root/rpmbuild/RPMS/x86_64/nginx-1.16.0-1.el7.x86_64.rpmPreparing... 1:nginx $rpm -qi nginxInstall Date: 2019年06月19日 星期三 17时18分26秒
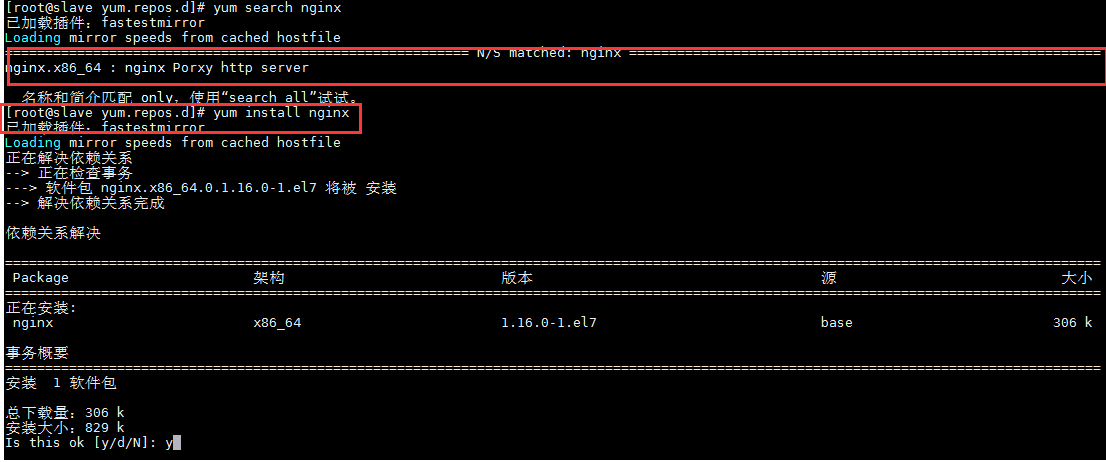
yum仓库下载安装我们打包的rpm包:1 2 3 4 5 6 7 8 9 10 11 12 13 14 15 16 17 18 19 20 21 nginx -v nginx version: nginx/1.16.0 [root@slave yum.repos.d] Name : nginx Version : 1.16.0 Release : 1.el7 Architecture: x86_64 Install Date: 2019年06月20日 星期四 11时47分09秒 Group : Applications/Archiving Size : 849363 License : GPLv2 Signature : (none) Source RPM : nginx-1.16.0-1.el7.src.rpm Build Date : 2019年06月20日 星期四 11时35分30秒 Build Host : master Relocations : (not relocatable) Packager : weiyigeek <weiyigeek@qq.com> URL : http://weiyigeek.github.io Summary : nginx Porxy http server Description : Custom a rpm by yourself!Build nginx-1.16.0.tar.gz to nginx-1.16.0.rpm
之后直接采用nginx搭建yum仓库提供局域网内其他机器使用:1 2 3 4 5 6 7 8 9 10 11 12 13 14 15 16 17 18 19 20 21 22 23 $vi /application/nginx/conf/nginx.conf autoindex on; autoindex_exact_size off; autoindex_localtime on; $createrepo ./$tree repodata/repodata/ wget http://192.168.1.247
weiyigeek.top-yum仓库
3. FPM打包工具入门使用 安装环境:CentOS Linux release 7.6.1810 (Core) 3.10.0-957.12.2.el7.x86_64https://github.com/jordansissel/fpm
1.FPM主要特点 :
支持的源类型包:
dir 将目录打包成所需要的类型,可以用于源码编译安装的软件包
rpm 对rpm进行转换
gem 对rubygem包进行转换
python 将python模块打包成相应的类型
支持的目标类型包: 转换为rpm包 / 转换为deb包 / 转换为solaris包 / 转换为puppet模块
2.FPM参数和用法 :1 2 3 4 5 6 7 8 9 10 11 12 -s 指定源类型 -t 指定目标类型,即想要制作为什么包 -n 指定包的名字 -v 指定包的版本号 -C 指定打包的相对路径(在搜索文件之前,将目录更改为这里) -d 指定依赖于哪些包 -f 第二次打包时目录下如果有同名安装包存在,则覆盖它 -p 输出的安装包的目录,不想放在当前目录下就需要指定 --post-install 软件包安装完成之后所要运行的脚本;同--after-install --pre-install 软件包安装完成之前所要运行的脚本;同--before-install --post-uninstall 软件包卸载完成之后所要运行的脚本;同--after-remove --pre-uninstall 软件包卸载完成之前所要运行的脚本;同--before-remove
3.安装FPM工具 1 2 3 4 5 6 7 8 9 10 11 12 13 14 15 fpm 是 ruby 写的,因此系统环境需要 ruby且 ruby 版本号大于 1.8.5。 yum -y install ruby ruby-devel rubygems rpm -qa ruby rubygems ruby-devel gem sources gem sources -a https://mirrors.aliyun.com/rubygems/ gem sources --remove https://rubygems.org/ gem install fpm
实际案例:(我们还是以nginx为例)1 2 3 4 5 6 7 8 9 10 11 12 13 14 15 16 17 18 19 20 21 22 23 pcre-devel openssl-devel useradd -M -s /sbin/nologin nginx tar zxvf nginx-1.8.1.tar.gz -C /usr/src/ /usr/src/nginx-1.8.1/configure --prefix=/usr/local /nginx --user=nginx --group=nginx --with-http_ssl_module --with-http_stub_status_module make && make install ln -s /usr/local /nginx/sbin/* /usr/local /sbin/ nginx nginx -s stop $im /tnp/nginx.sh#!/bin/bash useradd -M -s /sbin/nologin nginx ln -s /usr/local /nginx/sbin/* /usr/local /sbin/ $fpm -s dir -t rpm -n nginx -v 1.15.9 -d 'pcre-devel,openssl-devel' --post-install /tmp/nginx.sh -f /usr/local /nginx/[root@izwz9biz2m4sd3bb3k38pgz web]$ fpm -s dir -t rpm -n nginx -v 1.15.9 -d 'pcre-devel,openssl-devel' --post-install /tmp/nginx.sh -f `pwd ` Created package {:path=>"nginx-1.15.9-1.x86_64.rpm" } yum -y localinstall nginx-1.15.9-1.x86_64.rpm
weiyigeek.top-fpm打包
0x04 入坑体验 问题1:安装 fpm 打包工具时提示以下错误:ERROR: Error installing fpm: 1 2 3 4 5 6 7 8 解决方法: gem install json -v 1.8.3 gem install fpm -v 1.3.3 或者 gem install fpm //先直接安装一次,再安装一个低版本的 gem install fpm -v 1.3.3


