[TOC]
0x00 简述前言 描述:Shell的类型有很多种并且本身自带的特性,但是对于用户来说远远不能满足用户的DIY,所以 Shell 配置框架孕育而生,常用的Shell配置框架如下:
bash 配置框架是 Bash-it
zsh 配置框架是 Oh My Zsh
0x01 Bash终端美化 描述:Bash-it 配置框架从社区收集了许多实用的命令和脚本,主要包括别名、自动补全代码、定制函数、以及提示符主题等四大类型。
环境安装:
[TOC]
0x00 简述前言 描述:Shell的类型有很多种并且本身自带的特性,但是对于用户来说远远不能满足用户的DIY,所以 Shell 配置框架孕育而生,常用的Shell配置框架如下:
bash 配置框架是 Bash-it
zsh 配置框架是 Oh My Zsh
0x01 Bash终端美化 描述:Bash-it 配置框架从社区收集了许多实用的命令和脚本,主要包括别名、自动补全代码、定制函数、以及提示符主题等四大类型。
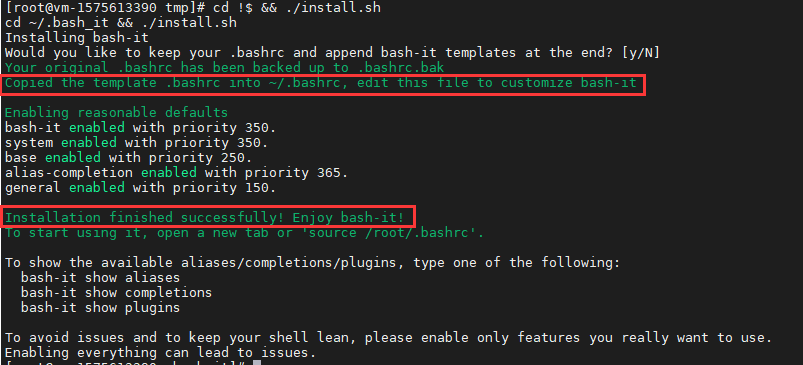
环境安装:1 2 3 4 5 6 7 8 9 10 11 12 13 14 15 16 17 18 19 20 21 22 23 24 25 26 27 28 29 30 31 32 $ which git /usr/bin/git yum install -y git $ git clone --depth=1 \ https://github.com/Bash-it/bash-it.git \ ~/.bash_it Cloning into '/root/.bash_it' ... cd !$ && ./install.sh -s您想要保留您的.bashrc并在末尾追加bash-it模板吗?[y / N] N 原有的 .bashrc 配置文件将备份为 .bashrc.bak -rw-r--r-- 1 root root 1.9K May 9 14:30 .bashrc -rw-r--r-- 1 root root 3.2K May 8 16:44 .bashrc.bak source ~/.bashrc
weiyigeek.top-安装成功
bash-it 命令 基础语法:1 2 3 4 5 6 7 8 9 10 11 12 13 14 15 16 bash-it : Bash-it help and maintenance parameters: 1: verb [one of: help | show | enable | disable | migrate | update | search | version | reload ] 2: component type [one of: alias (es) | completion(s) | plugin(s) ] or search term(s) 3: specific component [optional] examples: $ bash-it show plugins $ bash-it help aliases $ bash-it enable plugin git [tmux]... $ bash-it disable alias hg [tmux]... $ bash-it migrate $ bash-it update $ bash-it search [-|@]term1 [-|@]term2 ... [ -e/--enable ] [ -d/--disable ] [ -r/--refresh ] [ -c/--no-color ] $ bash-it version $ bash-it reload
aliases(别名) 基础示例:1 2 3 4 5 6 7 8 9 10 11 12 13 14 15 16 17 18 19 20 21 22 23 24 25 26 27 28 29 30 31 32 33 34 35 36 37 38 39 40 41 42 43 44 45 46 47 48 49 50 51 52 53 54 55 56 57 58 59 60 61 62 63 64 65 66 67 68 69 70 71 72 73 74 75 76 bash-it show aliases | less Alias Enabled? Description ag [ ] (未启用) the silver searcher (ag) aliases $ bash-it enable alias <alias name> [alias name]... -or- $ bash-it enable alias all $ bash-it disable alias <alias name> [alias name]... -or- $ bash-it disable alias all bash-it enable alias git git enabled with priority 150. bash-it help aliases git | less bash-it disable alias gitsvn
completions(补全) 基础示例:1 2 3 4 5 6 7 8 9 10 11 bash-it show completions | less $ bash-it enable completion <completion name> [completion name]... -or- $ bash-it enable completion all $ bash-it disable completion <completion name> [completion name]... -or- $ bash-it disable completion all
plugins(插件) 基础示例:1 2 3 4 5 6 7 8 9 bash-it show plugins | less Plugin Enabled? Description alias -completion [x] Automatic completion of aliases$ bash-it enable plugin <plugin name> [plugin name]... -or- $ bash-it enable plugin all $ bash-it disable plugin <plugin name> [plugin name]... -or- $ bash-it disable plugin all
search(搜索内容) 描述:Bash-it 还提供了一个非常快捷的方式来查找所需的内容,比如我们想要看看有关 tmux 和 ansible 的情况;
基础示例:1 2 3 4 5 6 7 8 9 10 11 12 13 14 15 ○ → bash-it search base plugins: base 2020-05-09 15:50:36 ⌚ vm-1575613390 in ~ ○ → bash-it search git aliases: git gitsvn plugins: autojump git git-subrepo jgitflow jump completions: git git_flow git_flow_avh ~$ bash-it search git --enable
注意事项:
1.如果出现执行 bash-it search base 出现以下错误1 2 3 4 5 6 7 bash: alias : /usr/bin/egrep: not found -bash: alias : -E: not found -bash: alias : \[: not found unalise egrep
2.可以通过下列命令来分别启用所有的别名、自动补全和插件1 2 3 ~$ bash-it enable alias all ~$ bash-it enable completion all ~$ bash-it enable plugin all
Theme主题更改 描述:Bash-it 随附了大约 50 多个提示符主题样式,如果想要看看这些主题的真实外观,那么我们可以执行下面的命令:1 2 3 4 5 6 7 8 9 10 11 12 13 14 15 16 17 18 19 20 21 22 23 24 25 26 27 28 $ BASH_PREVIEW=true bash-it reload 主题名称:zork ┌─[root][vm-1575613390][±][master ✓][~/.bash_it] └─▪ ┌─[root][vm-1575613390][±][master ✓][~/.bash_it] └─▪ exit 下面列举个人喜欢的主题: - powerline-multiline - powerline - modern-time - mairan - bira - agnoster vim ~/.bashrc export BASH_IT_THEME='zork' source !$Ctrl+D
weiyigeek.top-zork
为了使新设置的提示符主题生效,你需要关闭并重新打开终端,或者注销并重
自定义定制 描述:Bash-it 的确为我们提供了不少好用的别名、自动补全和插件,我们可以对其进行定制的机制,可以定制的内容包括别名、自动补全、插件、主题样式等等
路径和名称如下:1 2 3 4 5 • aliases/custom.aliases.bash:别名 • completion/custom.completion.bash:自动补全 • lib/custom.bash:库 • plugins/custom.plugins.bash:插件 • themes/<theme name>/<theme name>.theme.bash:主题样式
在此,我们以如何定制别名为例来说明,其它类型的定制方法类似,无非就是以特定的名称命名并放在确定的目录。1 2 ~$ cd ~/.bash_it/aliases/available ~$ vim custom.aliases.bash
Step2.接着添加具体的别名内容1 2 3 4 5 6 #!/bin/bash cite 'about-alias' about-alias 'Custom aliases for convenience.' alias sd='shutdown -h now' alias up='uptime'
Step3.利用以下命令来查看并启动1 2 3 4 5 $ bash-it show aliase custom [ ] Custom aliases for convenience. $ bash-it enable alias custom custom is already enabled.
Step4.再重新加载一下配置以及效果查看1 2 3 4 5 $ bash-it reload ┌─[root][vm-1575613390][±][maste][~/.bash_it/aliases/available] └─▪ up 16:23:58 up 131 days, 17:55, 1 user, load average: 0.18, 0.09, 0.06
0x02 Zsh终端美化 环境依赖:zsh(肯定需要这个啦),一些front字体安装;安装流程: 1 2 3 4 5 6 7 8 9 10 11 12 13 14 15 16 17 18 19 20 21 22 23 24 25 26 27 28 $ echo $SHELL /bin/bash $ cat /etc/shells /bin/sh /bin/bash /sbin/nologin /usr/bin/sh /usr/bin/bash /usr/sbin/nologin /bin/tcsh /bin/csh $ sudo apt-get install zsh $ yum -y install zsh $ brew install zsh chsh -s /bin/zsh /usr/local /bin/zsh chsh -s /usr/local /bin/zsh
安装oh-my-zsh源码是放在github上,先确保你的机器上已安装了git1 2 3 4 5 6 wget https://github.com/robbyrussell/oh-my-zsh/raw/master/tools/install.sh -O - | sh git clone git://github.com/robbyrussell/oh-my-zsh.git ~/.oh-my-zsh cp ~/.oh-my-zsh/templates/zshrc.zsh-template ~/.zshrc
zsh目录说明: 1 2 3 ~/.oh-my-zsh master ls cache CONTRIBUTING.md lib log plugins(插件) templates(主题模板) tools CODE_OF_CONDUCT.md custom(自定义模板) LICENSE.txt oh-my-zsh.sh README.md themes
zsh主题修改 ~/.zshrc1 2 3 4 5 6 7 8 $ls ~/.zshrc/home/ubuntu/.zshrc sed -r -i.bak 's#ZSH_THEME="[a-z].+"#ZSH_THEME="agnoster"#' ~/.zshrc $ source ~/.zshrc
附录主题:
[agnoster-fcamblor主题] : git clone https://github.com/fcamblor/oh-my-zsh-agnoster-fcamblor.git
插件安装 http://mimosa-pudica.net/zsh-incremental.html 1 2 3 4 5 $ mkdir ~/.oh-my-zsh/plugins/incr $ wget http://mimosa-pudica.net/src/incr-0.2.zsh -P ~/.oh-my-zsh/plugins/incr/ echo 'source ~/.oh-my-zsh/plugins/incr/incr*.zsh' >> ~/.zshrc
(2) 语法高亮插件1 2 3 4 5 git clone https://github.com/zsh-users/zsh-syntax-highlighting.git ${ZSH_CUSTOM:-~/.oh-my-zsh/custom} /plugins/zsh-syntax-highlighting plugins=(git zsh-syntax-highlighting)
(3) 字体设置1 2 3 https://raw.githubusercontent.com/tonsky/FiraCode/master/distr/ttf/FiraCode-Retina.ttf https://github.com/powerline/powerline/raw/develop/font/PowerlineSymbols.otf https://github.com/abertsch/Menlo-for-Powerline.git
Refenrence
WSL优化配置 什么是WSL?
启动启用WSL(Ubuntu), 参看Windows10常用配置.md
WSL安装后的目录位置:C:\Users\用户名\AppData\Local\Packages\CanonicalGroupLimited.UbuntuonWindows_79rhkp1fndgsc\LocalState\rootfs
WSL初步配色调料包: 1 2 3 4 5 字体:consolas 字体大小:24 屏幕文字颜色:220 220 220 屏幕背景颜色:50 50 50 不透明度:95%
WSL采用Solarized配色调料包:1 2 背景rgb(0,43,53) 文字rgb(147,161,161)
1 2 3 4 5 github源码:https://github.com/Microsoft/Terminal/tree/master/src/tools/ColorTool github下载:https://github.com/microsoft/terminal/releases/tag/1904.29002 ./ColorTool.exe -d schemes/solarized_dark.itermcolors
配置流程步骤 1 echo 'DEFAULT_USER="ubuntu"' >> ~/.zshrc
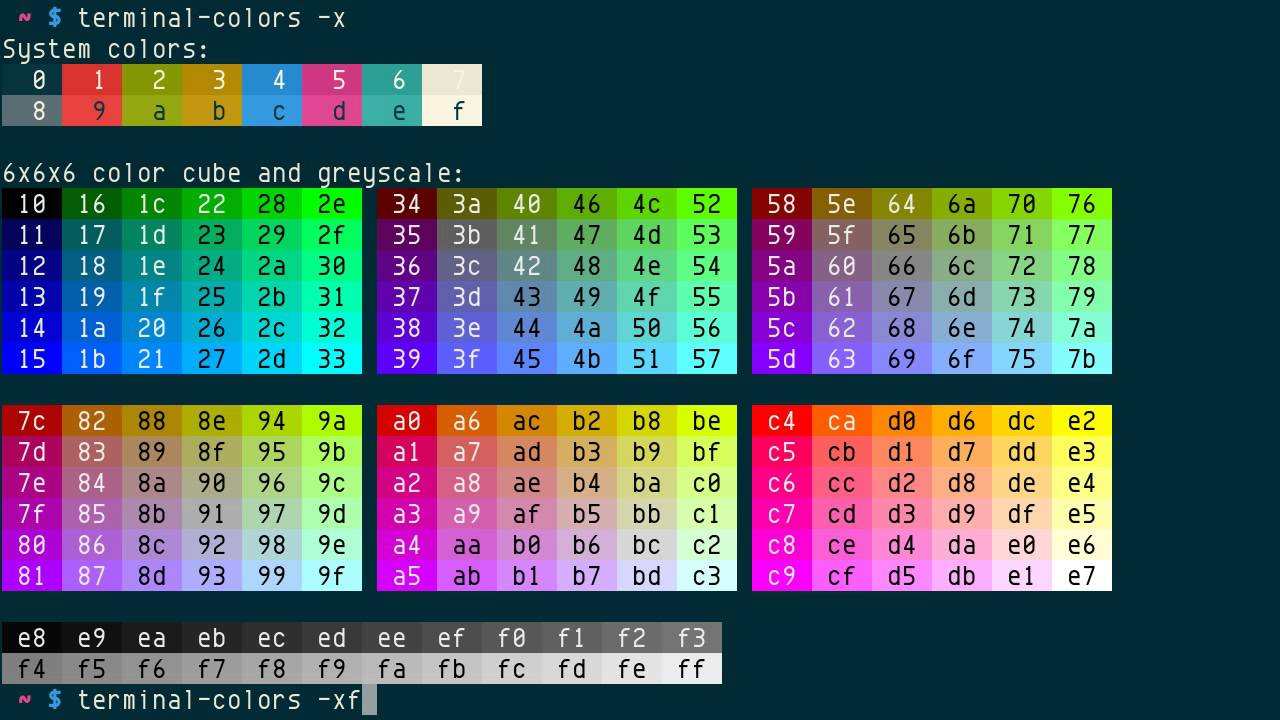
2.由于CMD的原因默认自带的蓝色的色调不能很好的看清楚,需要将其中blue修改为075,这样颜色会更容易辨认了1 2 3 4 5 6 7 8 9 10 11 12 13 14 15 16 17 18 cp ~/.oh-my-zsh/themes/agnoster.zsh-theme ~/.oh-my-zsh/custom/themes/agnoster_wsl.zsh-theme prompt_dir prompt_segment 075 $CURRENT_FG '%~' } prompt_dir prompt_segment 075 black '%~' } sed -r -i.bak 's#ZSH_THEME="[a-z].+"#ZSH_THEME="agnoster"#' ~/.zshrc
weiyigeek.top-颜色表
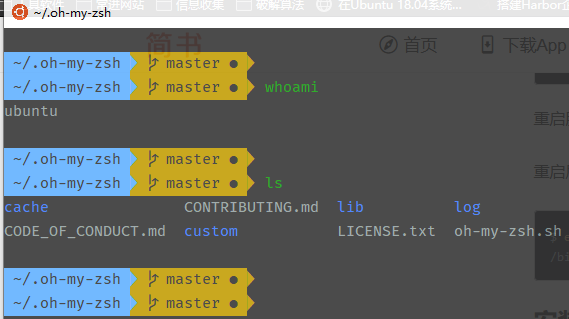
最后效果如下:
weiyigeek.top-效果示例
CloudStudioIDE终端配置 Step1.需要进行系统字体的环境设置1 2 3 4 5 6 sudo apt-get install fonts-powerline git clone https://github.com/powerline/fonts.git --depth=1 cd fonts./install.sh
Step2.下载指定的字体以及依赖,Liunx字体设置由于我们是从网页上显示,最好在客户端也进行安装字体1 2 3 wget https://github.com/powerline/powerline/raw/develop/font/PowerlineSymbols.otf mv PowerlineSymbols.otf ~/.local /share/fonts/ fc -cache -vf ~/.local /share/fonts/
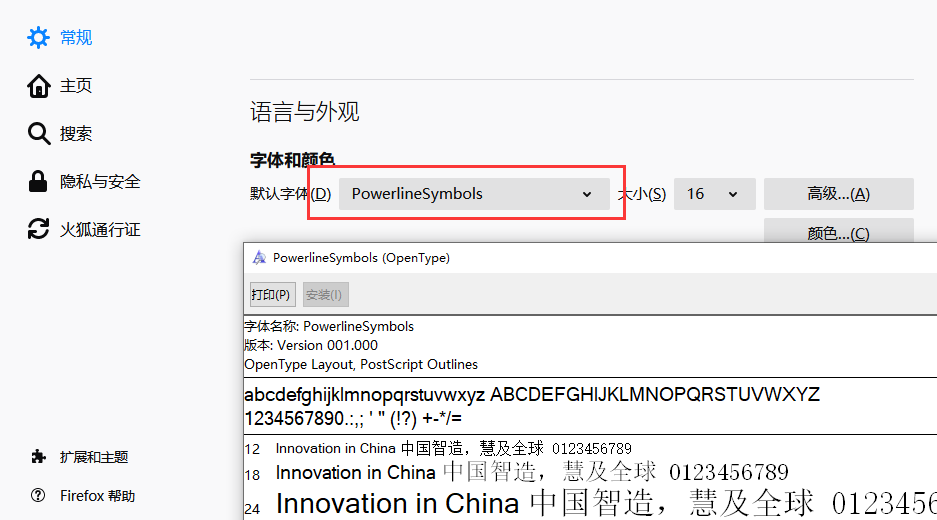
Step3.本地客户端安装PowerlineSymbol字体,并且在浏览器里面进行设置
weiyigeek.top-浏览器字体设置
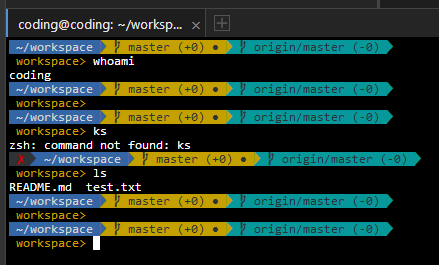
最后效果如下:
weiyigeek.top-cloudStudio
参考:
VisualStudioCode 描述:为了让VScode终端正确的显示zsh的主题agnoster,在我们本地的VisualStudioCode进行选择我们安装的字体,让终端更能方便的显示;1 2 3 4 5 6 7 8 9 10 11 12 13 14 15 16 17 $cd /usr/share/fonts/truetype/$sudo git clone https://github.com/abertsch/Menlo-for-Powerline.git$sudo fc -cache -f -vfc -cache: succeeded
其他设置:1 2 3 4 #vscode进行设置终端字体 "editor.fontFamily": "Consolas, 'Courier New', monospace", "editor.fontLigatures": false, "terminal.integrated.fontFamily": "Menlo for Powerline",
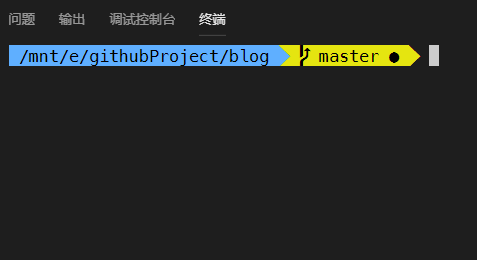
最终效果:
weiyigeek.top-Vscode-oh-my-zsh

