[toc]
0x00 前言简述
描述: 为了更好的学习kubernetes以及对照其在不同操作系统之下使用的性能以及差异进行学习扩容,下面将使用Ubuntu进行K8s集群的安装;
说明: 在上一章之中我们采用 CentOS7 + KUbernetes 1.18.x
版本进行了安装演示,本章将使用Ubuntu 20.04 + Kubernetes 1.19.x版本 + IPVS + Ansible
等组合工具进行安装演示;
PS : 虽然K8s 1.20版本宣布将在1.24版本之后将不再维护dockershim,意味着K8s将不直接支持Docker,不过大家不必过于担心。
- 一是在1.24版本之前我们仍然可以使用Docker,
- 二是dockershim肯定会有人接盘,我们同样可以使用Docker,当前【2022年4月18日 09:46:03】现已可以使用containerd替代ockershim
- 三是docker制作的镜像仍然可以在其他Runtime环境中使用,所以大家不必过于恐慌。
Tips : 经过测试发现本文方法在 docker(19.03.15 - 19.x) 以及 kubernetes(v1.19.10) 构建集群是没有任何问题的。
0x01 基础环境准备
描述: 有了2-Kubernetes入门之CentOS安装部署集群.md
的基础进行对照在Ubuntu下安装K8s的不同
1.环境说明
1 | # 此处是在VMware进行实际的 |
主机说明:1
2
3
4
5
6
7
8
9
10# Master
weiyigek-107
weiyigek-108
weiyigek-109
# worker
weiyigek-223
weiyigek-224
weiyigek-225
weiyigek-226
K8s 安装环境基础要求:1
2
3
4* 每台机器 2 GB 或更多的 RAM (如果少于这个数字将会影响您应用的运行内存)
* 每台机器 2 CPU 核或更多
* 集群中的所有机器的网络彼此均能相互连接(公网和内网都可以)
* 保证机器主机名/网卡UUID和IP地址以及Mac地址唯一
PS : 注意Master与Node在一致的情况下进行下列安装(我们已做过安全加固)可能安装过程中,读者实践部署的时候有一定的出入(一般是依赖的软件未安装);
2.环境操作
Tips 注意: 所有主机都需要按照以下操作流程
Step 1.各Master与工作节点的机器名称及其设置;
1
2
3
4
5
6
7
8
9
10
11
12
13
14
15
16
17
18# *- IP 地址修改 -* & *- 主机 名称修改 -*
mkdir ~/init/
tee ~/init/network.sh <<'EOF'
CURRENT_IP=$(hostname -I | cut -f 1 -d " ")
GATEWAY=$(hostname -I | cut -f 1,2,3 -d ".")
if [[ $# -lt 3 ]];then
echo "Usage: $0 IP Gateway Hostname"
exit
fi
echo "IP:${1} # GATEWAY:${2} # HOSTNAME:${3}"
sudo sed -i "s#${CURRENT_IP}#${1}#g" /etc/netplan/00-installer-config.yaml
sudo sed -i "s#${GATEWAY}.1#${2}#g" /etc/netplan/00-installer-config.yaml
sudo hostnamectl set-hostname ${3}
sudo netplan apply
EOF
chmod +x ~/init/network.sh
sudo ~/init/network.sh 192.168.1.107 192.168.1.1 weiyigeek-107Step 2.安装依赖软件以及关闭停用不需要使用的软件
1
2
3
4
5
6
7
8# (1) 卸载系统中自带的 snapd 软件
# sudo systemctl stop snapd snapd.socket
# sudo apt autoremove --purge -y snapd
# sudo apt install -y linux-modules-extra-5.4.0-52-generic linux-headers-5.4.0-52
# (2) 关闭自启和停止不用的软件 (Ubuntu server 20.04 最小安装不存在)
# sudo systemctl stop postfix
# sudo systemctl disable postfix
- Step 3.各Master与工作节点的机器系统时间的同步与时区设置
1
2
3
4
5
6
7
8
9
10
11
12
13
14# 设置系统时区为中国/上海
sudo cp /usr/share/zoneinfo/Asia/Shanghai /etc/localtime
sudo timedatectl set-timezone Asia/Shanghai
sudo bash -c "echo 'Asia/Shanghai' > /etc/timezone"
sudo ntpdate ntp1.aliyun.com
# 将当前的 UTC 时间写入硬件时钟
sudo timedatectl set-local-rtc 0
# 重启依赖于系统时间的服务
sudo systemctl restart rsyslog.service cron.service
# 查看系统时间
date -R
- Step 4.虚拟内存swap分区关闭
Q: 什么安装K8s需要关闭SWAP虚拟内存?答: 由于Kubeadm在进行K8s安装init初始化时候会检测系统中是否存在swap如果存在会在安装时候有一个警告,尽管您可以利用ingore来忽略它但是确实对性能有一定的影响;
例如有可能我们创建的Pod运行在虚拟内存上面与运行在物理内存中Pod不管是RW效率都比较低;1
2
3
4
5
6
7
8
9
10
11
12
13sudo swapoff -a && sudo sed -i '/ swap / s/^\(.*\)$/#\1/g' /etc/fstab && free # CentOS
sudo swapoff -a && sudo sed -i 's/^\/swap.img\(.*\)$/#\/swap.img \1/g' /etc/fstab && free #Ubuntu
# 不同点: Ubuntu 没有 CentOS 中的 selinux 所以无需关闭
# setenforce 0 && sed -i 's/^SELINUX=.*/SELINUX=disabled/' /etc/selinux/config
# root@weiyigeek-107:~# free
# total used free shared buff/cache available
# Mem: 8151900 223192 7684708 880 244000 7674408
# Swap: 4194300 0 4194300
# root@weiyigeek-107:~# swapoff -a && sed -i '/ swap / s/^\(.*\)$/#\1/g' /etc/fstab
# root@weiyigeek-107:~# free
# total used free shared buff/cache available
# Mem: 8151900 223312 7684356 880 244232 7674256
# Swap: 0 0 0
- Step 5.为了能在 kube-proxy 开启并使用 ipvs 我们需要加载以下模块(所有节点执行);
1
2
3
4
5
6
7
8
9
10
11
12
13
14
15
16
17
18
19
20
21
22
23
24
25
26
27
28
29
30
31
32
33
34
35
36
37
38
39
40
41
42
43
44
45
46
47
48
49
50
51
52
53
54
55
56# (1) 安装 ipvs 以及 负载均衡相关依赖
sudo apt -y install ipvsadm ipset sysstat conntrack
# (2) ipvs 内核模块手动加载(所有节点配置)
mkdir ~/k8s-init/
tee ~/k8s-init/ipvs.modules <<'EOF'
modprobe -- ip_vs
modprobe -- ip_vs_lc
modprobe -- ip_vs_lblc
modprobe -- ip_vs_lblcr
modprobe -- ip_vs_rr
modprobe -- ip_vs_wrr
modprobe -- ip_vs_sh
modprobe -- ip_vs_dh
modprobe -- ip_vs_fo
modprobe -- ip_vs_nq
modprobe -- ip_vs_sed
modprobe -- ip_vs_ftp
modprobe -- ip_tables
modprobe -- ip_set
modprobe -- ipt_set
modprobe -- ipt_rpfilter
modprobe -- ipt_REJECT
modprobe -- ipip
modprobe -- xt_set
modprobe -- br_netfilter
modprobe -- nf_conntrack
EOF
# (3) 加载内核配置(临时|永久)注意管理员执行
chmod 755 ~/k8s-init/ipvs.modules && sudo bash ~/k8s-init/ipvs.modules
sudo cp ~/k8s-init/ipvs.modules /etc/profile.d/ipvs.modules.sh
lsmod | grep -e ip_vs -e nf_conntrack
# ip_vs_ftp 16384 0
# ip_vs_sed 16384 0
# ip_vs_nq 16384 0
# ip_vs_fo 16384 0
# ip_vs_dh 16384 0
# ip_vs_sh 16384 0
# ip_vs_wrr 16384 0
# ip_vs_rr 16384 0
# ip_vs_lblcr 16384 0
# ip_vs_lblc 16384 0
# ip_vs_lc 16384 0
# ip_vs 155648 22 ip_vs_rr,ip_vs_dh,ip_vs_lblcr,ip_vs_sh,ip_vs_fo,ip_vs_nq,ip_vs_lblc,ip_vs_wrr,ip_vs_lc,ip_vs_sed,ip_vs_ftp
# nf_nat 40960 3 iptable_nat,xt_MASQUERADE,ip_vs_ftp
# nf_conntrack 139264 5 xt_conntrack,nf_nat,nf_conntrack_netlink,xt_MASQUERADE,ip_vs
# nf_defrag_ipv6 24576 2 nf_conntrack,ip_vs
# libcrc32c 16384 5 nf_conntrack,nf_nat,btrfs,raid456,ip_vs
# (4) 下面的方式 Ubuntu 不能正确执行)
# ls /etc/modules-load.d/
# sudo systemctl enable --now systemd-modules-load.service
PS : kube-proxy 是开启使用IPVS的前提条件必须正常安装;
- Step 6.集群各主机节点内核Kernel参数的调整( Kubernetes 安装前的必须进行该内核参数优化&配置)
1
2
3
4
5
6
7
8
9
10
11
12
13
14
15
16
17
18
19
20
21
22
23
24
25
26
27
28
29
30
31
32
33
34
35
36
37
38
39
40
41
42
43
44
45
46
47
48
49
50
51
52
53
54
55
56
57
58# 1.Kernel 参数调整
mkdir ~/k8s-init/
cat > ~/k8s-init/kubernetes-sysctl.conf <<EOF
# iptables 网桥模式开启
net.bridge.bridge-nf-call-iptables=1
net.bridge.bridge-nf-call-ip6tables=1
# 禁用 ipv6 协议
net.ipv6.conf.all.disable_ipv6=1
# 启用ipv4转发
net.ipv4.ip_forward=1
# net.ipv4.tcp_tw_recycle=0 #Ubuntu 没有参数
# 禁止使用 swap 空间,只有当系统 OOM 时才允许使用它
vm.swappiness=0
# 不检查物理内存是否够用
vm.overcommit_memory=1
# 不启 OOM
vm.panic_on_oom=0
# 文件系统通知数(根据内存大小和空间大小配置)
fs.inotify.max_user_instances=8192
fs.inotify.max_user_watches=1048576
# 文件件打开句柄数
fs.file-max=52706963
fs.nr_open=52706963
net.netfilter.nf_conntrack_max=2310720
# tcp keepalive 相关参数配置
net.ipv4.tcp_keepalive_time = 600
net.ipv4.tcp_keepalive_probes = 3
net.ipv4.tcp_keepalive_intvl =15
net.ipv4.tcp_max_tw_buckets = 36000
net.ipv4.tcp_tw_reuse = 1
net.ipv4.tcp_max_orphans = 327680
net.ipv4.tcp_orphan_retries = 3
net.ipv4.tcp_syncookies = 1
net.ipv4.tcp_max_syn_backlog = 16384
# net.ipv4.ip_conntrack_max = 65536 # Ubuntu 没有参数
net.ipv4.tcp_timestamps = 0
net.core.somaxconn = 32768
EOF
sudo cp ~/k8s-init/kubernetes-sysctl.conf /etc/sysctl.d/99-kubernetes.conf
sudo sysctl -p /etc/sysctl.d/99-kubernetes.conf
# 2.nftables 模式切换
# 在 Linux 中 nftables 当前可以作为内核 iptables 子系统的替代品,该工具可以充当兼容性层其行为类似于 iptables 但实际上是在配置 nftables。
$ apt list | grep "nftables/focal"
# nftables/focal 0.9.3-2 amd64
# python3-nftables/focal 0.9.3-2 amd64
# iptables 旧模式切换 (nftables 后端与当前的 kubeadm 软件包不兼容, 它会导致重复防火墙规则并破坏 kube-proxy, 所则需要把 iptables 工具切换到“旧版”模式来避免这些问题)
sudo update-alternatives --set iptables /usr/sbin/iptables-legacy
sudo update-alternatives --set ip6tables /usr/sbin/ip6tables-legacy
# sudo update-alternatives --set arptables /usr/sbin/arptables-legacy # PS: # Ubuntu 20.04 TLS 无该模块
# sudo update-alternatives --set ebtables /usr/sbin/ebtables-legacy # PS: # Ubuntu 20.04 TLS 无该模块
- Step 7.主机名称设置与hosts文件添加
1
2
3
4
5
6
7
8
9
10
11
12
13
14
15
16
17# 主机名称 以及 其他节点node主机绑定
# hostnamectl set-hostname weiyigeek-107
sudo tee -a /etc/hosts <<'EOF'
# dev & test - master
192.168.1.107 weiyigeek-107
192.168.1.108 weiyigeek-108
192.168.1.109 weiyigeek-109
# dev & test - work
192.168.1.223 weiyigeek-223
192.168.1.224 weiyigeek-224
192.168.1.225 weiyigeek-225
192.168.1.226 weiyigeek-226
# kubernetes-vip (如果不是高可用集群,该IP为Master01的IP)
192.168.1.110 weiyigeek-lb-vip.k8s
EOF
- Step 8.设置 rsyslogd 和 systemd journald 记录
1
2
3
4
5
6
7
8
9
10
11
12
13
14
15
16
17
18
19
20
21
22
23
24
25
26
27sudo mkdir -pv /var/log/journal/ /etc/systemd/journald.conf.d/
sudo tee /etc/systemd/journald.conf.d/99-prophet.conf <<'EOF'
[Journal]
# 持久化保存到磁盘
Storage=persistent
# 压缩历史日志
Compress=yes
SyncIntervalSec=5m
RateLimitInterval=30s
RateLimitBurst=1000
# 最大占用空间 10G
SystemMaxUse=10G
# 单日志文件最大 100M
SystemMaxFileSize=100M
# 日志保存时间 2 周
MaxRetentionSec=2week
# 不将日志转发到syslog
ForwardToSyslog=no
EOF
cp /etc/systemd/journald.conf.d/99-prophet.conf ~/k8s-init/journald-99-prophet.conf
sudo systemctl restart systemd-journald
- Step 9.在各个主机中安装 docker软件
1
2
3
4
5
6
7
8
9
10
11
12
13
14
15
16
17
18
19
20
21
22
23
24
25
26
27
28
29
30
31
32
33
34
35
36
37
38
39
40
41
42
43
44
45
46
47
48
49
50
51
52
53
54
55
56
57
58
59
60# 1.卸载旧版本
sudo apt-get remove docker docker-engine docker.io containerd runc
# 2.更新apt包索引并安装包以允许apt在HTTPS上使用存储库
sudo apt-get install -y \
apt-transport-https \
ca-certificates \
curl \
gnupg-agent \
software-properties-common
# 3.添加Docker官方GPG密钥 # -fsSL
curl https://download.docker.com/linux/ubuntu/gpg | sudo apt-key add -
# 4.通过搜索指纹的最后8个字符进行密钥验证
sudo apt-key fingerprint 0EBFCD88
# 5.设置稳定存储库
sudo add-apt-repository \
"deb [arch=amd64] https://download.docker.com/linux/ubuntu \
$(lsb_release -cs) \
stable"
# 6.Install Docker Engine 默认最新版本
sudo apt-get update && sudo apt-get install -y docker-ce docker-ce-cli containerd.io
sudo apt-get install -y docker-ce=5:19.03.15~3-0~ubuntu-focal docker-ce-cli=5:19.03.15~3-0~ubuntu-focal containerd.io
# 7.安装特定版本的Docker引擎,请在repo中列出可用的版本
# $apt-cache madison docker-ce
# docker-ce | 5:20.10.2~3-0~ubuntu-focal | https://download.docker.com/linux/ubuntu focal/stable amd64 Packages
# docker-ce | 5:18.09.1~3-0~ubuntu-xenial | https://download.docker.com/linux/ubuntu xenial/stable amd64 Packages
# 使用第二列中的版本字符串安装特定的版本,例如:5:18.09.1~3-0~ubuntu-xenial。
# $sudo apt-get install docker-ce=<VERSION_STRING> docker-ce-cli=<VERSION_STRING> containerd.io
#8.将当前用户加入docker用户组然后重新登陆当前用户使得低权限用户
sudo gpasswd -a ${USER} docker
sudo gpasswd -a weiyigeek docker
#9.加速器建立
mkdir -vp /etc/docker/
sudo tee /etc/docker/daemon.json <<-'EOF'
{
"registry-mirrors": ["https://xlx9erfu.mirror.aliyuncs.com"],
"exec-opts": ["native.cgroupdriver=systemd"],
"log-driver": "json-file",
"log-opts": {
"max-size": "100m"
},
"live-restore": true,
"dns": ["192.168.12.254"],
"insecure-registries": ["harbor.weiyigeek.top"]
}
EOF
# PS : 私有仓库配置 insecure_registries
# 9.自启与启动
sudo systemctl enable --now docker
sudo systemctl restart docker
# 10.退出登陆生效
exit
- Step 10.先在
WeiyiGeek-107
机器中下载 kubernetes 集群相关的软件包并准备安装;1
2
3
4
5
6
7
8
9
10
11
12
13
14
15
16
17
18
19
20
21
22
23
24
25
26
27
28
29
30
31# (1) gpg 签名下载导入
curl https://mirrors.aliyun.com/kubernetes/apt/doc/apt-key.gpg | sudo apt-key add -
# (2) Kubernetes 安装源
cat <<EOF | sudo tee /etc/apt/sources.list.d/kubernetes.list
deb https://mirrors.aliyun.com/kubernetes/apt/ kubernetes-xenial main
EOF
# (3) 软件包索引更新以及只下载依赖包不安装kubernetes(注意此处建议采用指定版本下载 )
apt-cache madison kubelet kubeadm kubectl # 查看可用的 kubernetes 版本 最新 1.20.1
sudo apt-get update && sudo apt -d install kubelet kubeadm kubectl
kubelet --version
# Kubernetes v1.20.1
kubeadm version
# kubeadm version: &version.Info{Major:"1", Minor:"20", GitVersion:"v1.20.1", GitCommit:"c4d752765b3bbac2237bf87cf0b1c2e307844666", GitTreeState:"clean", BuildDate:"2020-12-18T12:07:13Z", GoVersion:"go1.15.5", Compiler:"gc", Platform:"linux/amd64"}
kubectl version
# Client Version: version.Info{Major:"1", Minor:"20", GitVersion:"v1.20.1", GitCommit:"c4d752765b3bbac2237bf87cf0b1c2e307844666", GitTreeState:"clean", BuildDate:"2020-12-18T12:09:25Z", GoVersion:"go1.15.5", Compiler:"gc", Platform:"linux/amd64"}
# 也可以指定版本下载(ls /var/cache/apt/archives/ # 缓存目录)
# sudo apt -d install kubelet=1.19.10-00 kubeadm=1.19.10-00 kubectl=1.19.10-00
# 如果只是下载deb相关包以供离线安装可以使用以下方式安装
sudo dpkg -i k8s-1.19.3/*.deb
# (2) systemd 守护进程重启
sudo systemctl daemon-reload
# (3) Kubelet是以POD的方式运行在容器之中,所以需要设置开机自启
sudo systemctl enable --now kubelet.service
# (4) 重启 docker
sudo systemctl restart docker
- Step 11.关机此时克隆此Master机器为两台新的虚拟机机器;
1
2
3# (1) 按照上面的清单设置主机名称以及IP地址
./network.sh 192.168.1.108 192.168.1.1 weiyigeek-108
./network.sh 192.168.1.109 192.168.1.1 weiyigeek-109
0x02 单实例K8s集群部署(v1.20.1)
1.Master 节点初始化
- Step 1.单实例 Master 节点初始化以及集群资源清单配置(注意在前面的环境之下)
1
2
3# (1) 在 WeiyiGeek-107 Master 节点上运行 `kubeadm config print init-defaults` 查看初始化参数
# 方式1.简单命令
kubeadm init --kubernetes-version=1.20.1 --apiserver-advertise-address=192.168.1.201 --image-repository registry.aliyuncs.com/google_containers --service-cidr=10.2.0.0/16 --pod-network-cidr=10.3.0.0/16
1 | # 方式2.yaml方式由于此处没做高可以用则APISERVER指向集群的Master节点即weiyigeek-107机器 |
k8s 集群创建初始命令:1
2
3
4
5
6
7
8
9
10
11
12
13
14
15sudo kubeadm init --upload-certs --config=/home/weiyigeek/k8s-init/kubeadm-init-config.yaml -v 5 | tee kubeadm_init.log
# W1104 21:29:36.119447 198575 configset.go:348] WARNING: kubeadm cannot validate component configs for API groups [kubelet.config.k8s.io kubeproxy.config.k8s.io]
# [init] Using Kubernetes version: v1.20.1
# [preflight] Running pre-flight checks
# [preflight] Pulling images required for setting up a Kubernetes cluster
# [preflight] This might take a minute or two, depending on the speed of your internet connection
# [preflight] You can also perform this action in beforehand using 'kubeadm config images pull'
# [certs] Using certificateDir folder "/etc/kubernetes/pki"
# .....
# [bootstrap-token] Creating the "cluster-info" ConfigMap in the "kube-public" namespace
# [kubelet-finalize] Updating "/etc/kubernetes/kubelet.conf" to point to a rotatable kubelet client certificate and key
# [addons] Applied essential addon: CoreDNS
# [addons] Applied essential addon: kube-proxy
# Your Kubernetes control-plane has initialized successfully! # 表示控制化平面初始化成功
2.集群管理
描述: 集群管理配置控制平面1
2
3
4
5# (1) 要开始使用集群,您需要以普通用户的身份运行在 Master 节点 执行以下命令:
mkdir -p $HOME/.kube
sudo cp -i /etc/kubernetes/admin.conf $HOME/.kube/config
sudo chown $(id -u):$(id -g) $HOME/.kube/config
grep "KUBECONFIG" ~/.profile || echo "export KUBECONFIG=~/.kube/config" >> ~/.profile
3.集群网络插件安装
1 | # 部署集群 pod 网络可以选择 flannel |
4.工作节点加入
1 | # (1) 你现在可以以root身份加入任意数量的控制平面节点,在每个节点上运行以下命令: |
4.Token 失效重生成
- Step 1.如果超过24小时 token 失效需要重新生成
1
2
3
4
5
6
7
8
9
10
11# 1) Token 生成
kubeadm token create
# 2q41vx.w73xe9nrlqdujawu ##此处是新token
# 2) 获取CA(证书)公钥哈希值
openssl x509 -pubkey -in /etc/kubernetes/pki/ca.crt | openssl rsa -pubin -outform der 2>/dev/null | openssl dgst -sha256 -hex | sed 's/^ .* //'
# 3) kubernetes 证书目录
$ ls /etc/kubernetes/pki
apiserver.crt apiserver-etcd-client.key apiserver-kubelet-client.crt ca.crt etcd front-proxy-ca.key front-proxy-client.key sa.pub
apiserver-etcd-client.crt apiserver.key apiserver-kubelet-client.key ca.key front-proxy-ca.crt front-proxy-client.crt sa.key
5.节点重置
- Step 1.当 Kuberneters 集群需要清理重构建需或者节点脱离集群时可以按照以下操作进行:
1
2
3
4
5
6
7
8
9
10
11
12# - Master 工作负载移除指定集群 例如删除 weiyigeek-223 weiyigeek-222 工作节点
kubectl cordon weiyigeek-223 weiyigeek-222
kubectl delete node weiyigeek-223 weiyigeek-222
# 采用 ipvs 进行负载的时候需要清理`ipvsadm --clear`
sudo kubeadm reset
sudo rm -rf /etc/cni/net.d/*
sudo rm -rf /etc/kubernetes/pki/*
sudo rm -rf $HOME/.kube/config
# - Node 工作节点移除k8s集群
sudo kubeadm reset
sudo rm -rf /etc/cni/net.d/*
补充说明: 如果是在单master节点设置使用 calico 为 k8s 的CNI网络插件时1
2
3
4
5
6
7
8
9
10
11
12
13
14
15
16
17
18
19
20
21
22
23
24
25
26
27K8SVERSION=1.20.1
APISERVER_IP=192.168.1.107
APISERVER_NAME=k8s.weiyigeek.top
APISERVER_PORT=6443
SERVICE_SUBNET=10.99.0.0/16
POD_SUBNET=10.100.0.1/16
echo "${APISERVER_IP} ${APISERVER_NAME}" >> /etc/hosts
# 初始化配置(建议各个组件的版本与k8s的版本一致)
rm -f ./kubeadm-config.yaml
cat <<EOF > ./kubeadm-config.yaml
apiVersion: kubeadm.k8s.io/v1beta2
kind: ClusterConfiguration
kubernetesVersion: v${K8SVERSION}
imageRepository: mirrorgcrio
#imageRepository: registry.aliyuncs.com/google_containers
#imageRepository: registry.cn-hangzhou.aliyuncs.com/google_containers
#imageRepository: gcr.azk8s.cn/google_containers
controlPlaneEndpoint: "${APISERVER_NAME}:${APISERVER_PORT}"
networking:
serviceSubnet: "${SERVICE_SUBNET}"
podSubnet: "${POD_SUBNET}"
dnsDomain: "cluster.local"
EOF
# kubeadm init 根据您服务器网速的情况,您需要等候 3 - 10 分钟
kubeadm init --config=kubeadm-config.yaml --upload-certs
0x03 高可用K8s集群部署(v1.19.6)
Step 1.高可用组件安装所有Master节点通过apt安装HAProxy和KeepAlived
1 | # PS: 此时只下载不安装(方便传到没有网络的master节点上) |
Step 2.所有Master节点配置HAProxy
PS : 详细配置参考HAProxy文档,所有Master节点的HAProxy配置相同1
2
3
4
5
6
7
8
9
10
11
12
13
14
15
16
17
18
19
20
21
22
23
24
25
26
27
28
29
30
31
32
33
34
35
36
37
38
39
40
41
42
43
44
45
46
47
48
49
50
51
52
53
54
55
56
57
58
59# Ubuntu haproxy 配置文件目录
$ls /etc/haproxy/
errors/ haproxy.cfg
$sudo vim /etc/haproxy/haproxy.cfg
global
log /dev/log local0
log /dev/log local1 notice
chroot /var/lib/haproxy
stats socket /run/haproxy/admin.sock mode 660 level admin expose-fd listeners
stats timeout 30s
user haproxy
group haproxy
daemon
# Default SSL material locations
ca-base /etc/ssl/certs
crt-base /etc/ssl/private
# See: https://ssl-config.mozilla.org/#server=haproxy&server-version=2.0.3&config=intermediate
ssl-default-bind-ciphers ECDHE-ECDSA-AES128-GCM-SHA256:ECDHE-RSA-AES128-GCM-SHA256:ECDHE-ECDSA-AES256-GCM-SHA384:ECDHE-RSA-AES256-GCM-SHA384:ECDHE-ECDSA-CHACHA20-POLY1305:ECDHE-RSA-CHACHA20-POLY1305:DHE-RSA-AES128-GCM-SHA256:DHE-RSA-AES256-GCM-SHA384
ssl-default-bind-ciphersuites TLS_AES_128_GCM_SHA256:TLS_AES_256_GCM_SHA384:TLS_CHACHA20_POLY1305_SHA256
ssl-default-bind-options ssl-min-ver TLSv1.2 no-tls-tickets
defaults
log global
mode http
option httplog
option dontlognull
timeout connect 5000
timeout client 50000
timeout server 50000
errorfile 400 /etc/haproxy/errors/400.http
errorfile 403 /etc/haproxy/errors/403.http
errorfile 408 /etc/haproxy/errors/408.http
errorfile 500 /etc/haproxy/errors/500.http
errorfile 502 /etc/haproxy/errors/502.http
errorfile 503 /etc/haproxy/errors/503.http
errorfile 504 /etc/haproxy/errors/504.http
# 注意: 16443 为VIP的Apiserver-控制平面端口
frontend k8s-master
bind 0.0.0.0:16443
bind 127.0.0.1:16443
mode tcp
option tcplog
tcp-request inspect-delay 5s
default_backend k8s-master
# 注意: Master 节点的默认apiserver是6443端口
backend k8s-master
mode tcp
option tcplog
option tcp-check
balance roundrobin
default-server inter 10s downinter 5s rise 2 fall 2 slowstart 60s maxconn 250 maxqueue 256 weight 100
server weiyigeek-107 192.168.1.107:6443 check
server weiyigeek-108 192.168.1.108:6443 check
server weiyigeek-109 192.168.1.109:6443 check
所有Master节点配置KeepAlived,配置不一样,注意区分注意每个节点的IP和网卡(interface参数)
1
2
3
4
5
6
7
8
9
10
11
12
13
14
15
16
17
18
19
20
21
22
23
24
25
26
27
28
29
30
31
32
33
34
35
36
37
38
39
40
41
42
43
44
45
46
47
48
49
50
51
52
53
54
55
56
57
58
59
60
61
62
63
64
65
66
67
68
69
70
71
72
73
74
75
76
77
78
79
80
81
82
83
84
85
86
87
88
89
90
91
92
93
94
95
96
97
98
99
100
101
102
103
104
105mkdir -vp /etc/keepalived
# weiyigeek-107 Master 1
sudo tee /etc/keepalived/keepalived.conf <<'EOF'
! Configuration File for keepalived
global_defs {
router_id LVS_DEVEL
script_user root
enable_script_security
}
vrrp_script chk_apiserver {
script "/etc/keepalived/check_apiserver.sh"
interval 5
weight -5
fall 2
rise 1
}
vrrp_instance VI_1 {
state MASTER
interface ens160
mcast_src_ip 192.168.1.107
virtual_router_id 51
priority 101
advert_int 2
authentication {
auth_type PASS
auth_pass K8SHA_KA_AUTH
}
virtual_ipaddress {
192.168.1.110
}
# track_script {
# chk_apiserver
# }
}
EOF
# weiyigeek-108 Master 2 => Backup
sudo tee /etc/keepalived/keepalived.conf <<'EOF'
! Configuration File for keepalived
global_defs {
router_id LVS_DEVEL
script_user root
enable_script_security
}
vrrp_script chk_apiserver {
script "/etc/keepalived/check_apiserver.sh"
interval 5
weight -5
fall 2
rise 1
}
vrrp_instance VI_1 {
state BACKUP
interface ens160
mcast_src_ip 192.168.1.108
virtual_router_id 51
priority 101
advert_int 2
authentication {
auth_type PASS
auth_pass K8SHA_KA_AUTH
}
virtual_ipaddress {
192.168.1.110
}
# track_script {
# chk_apiserver
# }
}
EOF
# weiyigeek-108 Master 3 => Backup
sudo tee /etc/keepalived/keepalived.conf <<'EOF'
! Configuration File for keepalived
global_defs {
router_id LVS_DEVEL
script_user root
enable_script_security
}
vrrp_script chk_apiserver {
script "/etc/keepalived/check_apiserver.sh"
interval 5
weight -5
fall 2
rise 1
}
vrrp_instance VI_1 {
state BACKUP
interface ens160
mcast_src_ip 192.168.1.109
virtual_router_id 51
priority 101
advert_int 2
authentication {
auth_type PASS
auth_pass K8SHA_KA_AUTH
}
virtual_ipaddress {
192.168.1.110
}
# track_script {
# chk_apiserver
# }
}
EOF
Step 3.配置KeepAlived健康检查文件
1 | sudo tee /etc/keepalived/check_apiserver.sh <<'EOF' |
Step 4.启动haproxy和keepalived以及测试VIP
1 | # 自启动并立即启动 |
PS : 至此基于Haproxy与keepalive实现的高可用已经OK了;
Step 5.集群安装其它指定版本
PS : 在基础环境的安装中我们采用了 docker 1.20.x 以及 kubernetes 1.20.x
考虑到 k8s 在 1.23.x 版本之后将会丢弃docker而使用其它的CRI-O, 此处为了集群环境的稳定性将原本docker以及kubernetes版本删除,分别安装1.19.x版本;1
2
3
4
5
6
7
8
9
10
11
12
13
14
15
16
17
18
19
20
21
22
23
24# (1) 停止服务
sudo systemctl stop docker.service kubelet.service docker.socket
# (2) docker 容器卸载 && K8s 卸载
sudo apt-get remove docker-ce docker-ce-cli containerd.io kubectl kubeadm kubelet
# (3) 查看 docker 以及 k8s 版本
sudo apt-cache madison docker-ce docker-ce-cli kubelet
# sudo apt-get -d install docker-ce=5:19.03.14~3-0~ubuntu-focal docker-ce-cli=5:19.03.14~3-0~ubuntu-focal containerd.io # Download complete and in download only mode
# sudo dpkg -i /var/cache/apt/archives/*.deb
sudo apt-get install docker-ce=5:19.03.14~3-0~ubuntu-focal docker-ce-cli=5:19.03.14~3-0~ubuntu-focal containerd.io -y
sudo apt install kubelet=1.19.6-00 kubeadm=1.19.6-00 kubectl=1.19.6-00 -y
$ kubeadm version
# kubeadm version: &version.Info{Major:"1", Minor:"19", GitVersion:"v1.19.6", GitCommit:"1e11e4a2108024935ecfcb2912226cedeafd99df", GitTreeState:"clean", BuildDate:"2020-10-14T12:47:53Z", GoVersion:"go1.15.2", Compiler:"gc", Platform:"linux/amd64"}
$ kubelet --version
# Kubernetes v1.19.6
$ kubectl version
# Client Version: version.Info{Major:"1", Minor:"19", GitVersion:"v1.19.6", GitCommit:"1e11e4a2108024935ecfcb2912226cedeafd99df", GitTreeState:"clean", BuildDate:"2020-10-14T12:50:19Z", GoVersion:"go1.15.2", Compiler:"gc", Platform:"linux/amd64"}
# (4) 自启并启动服务
sudo systemctl daemon-reload
sudo systemctl enable --now docker
sudo systemctl enable --now kubelet
sudo systemctl restart docker kubelet
Step 6.集群初始化的yaml文件
描述: kubeadm 可以打印出初始化以及节点加入的配置模板;1
2
3
4
5
6
7
8
9
10
11
12
13
14
15
16
17
18
19
20
21
22
23
24
25
26
27
28
29
30
31
32
33
34
35
36
37
38
39
40
41
42
43
44
45
46
47
48
49
50
51
52
53
54
55
56
57# (1) 初始化
$ kubeadm config print init-defaults
apiVersion: kubeadm.k8s.io/v1beta2
bootstrapTokens:
- groups:
- system:bootstrappers:kubeadm:default-node-token
token: abcdef.0123456789abcdef
ttl: 24h0m0s
usages:
- signing
- authentication
kind: InitConfiguration
localAPIEndpoint:
advertiseAddress: 1.2.3.4
bindPort: 6443
nodeRegistration:
criSocket: /var/run/dockershim.sock
name: ubuntu
taints:
- effect: NoSchedule
key: node-role.kubernetes.io/master
---
apiServer:
timeoutForControlPlane: 4m0s
apiVersion: kubeadm.k8s.io/v1beta2
certificatesDir: /etc/kubernetes/pki
clusterName: kubernetes
controllerManager: {}
dns:
type: CoreDNS
etcd:
local:
dataDir: /var/lib/etcd
imageRepository: k8s.gcr.io
kind: ClusterConfiguration
kubernetesVersion: v1.19.0
networking:
dnsDomain: cluster.local
serviceSubnet: 10.96.0.0/12
scheduler: {}
# (2) 节点加入
$ kubeadm config print join-defaults
apiVersion: kubeadm.k8s.io/v1beta2
caCertPath: /etc/kubernetes/pki/ca.crt
discovery:
bootstrapToken:
apiServerEndpoint: kube-apiserver:6443
token: abcdef.0123456789abcdef
unsafeSkipCAVerification: true
timeout: 5m0s
tlsBootstrapToken: abcdef.0123456789abcdef
kind: JoinConfiguration
nodeRegistration:
criSocket: /var/run/dockershim.sock
name: ubuntu
taints: null
K8s 集群初始化配置文件(~/k8s-init/kubeadm-init-config.yaml
)1
2
3
4
5
6
7
8
9
10
11
12
13
14
15
16
17
18
19
20
21
22
23
24
25
26
27
28
29
30
31
32
33
34
35
36
37
38
39
40
41
42
43
44
45
46
47
48
49
50
51
52
53
54
55
56
57
58
59
60
61
62
63
64
65
66
67
68
69
70
71
72
73
74
75
76
77
78
79
80
81
82
83
84
85
86
87
88
89
90
91
92
93
94
95
96
97
98
99
100
101
102
103
104
105
106
107
108
109
110
111
112
113
114
115
116
117
118# (1) 注意 : Token的格式以及Pod子网的网段 (Calico)和ipvs的支持
K8SVERSION=1.19.6
k8SIMAGEREP="registry.cn-hangzhou.aliyuncs.com/google_containers"
APISERVER_NAME=weiyigeek-lb-vip.k8s
APISERVER_IP=192.168.1.110
APISERVER_PORT=16443
LOCALAPIVERVER_NAME=weiyigeek-107
LOCALAPISERVER_IP=192.168.1.107
LOCALAPISERVER_PORT=6443
SERVICE_SUBNET=172.16.0.0/16
cat <<EOF > ~/k8s-init/kubeadm-init-config.yaml
apiVersion: kubeadm.k8s.io/v1beta2
bootstrapTokens:
- groups:
- system:bootstrappers:kubeadm:default-node-token
token: 20w21w.httpweiyigeektop
ttl: 24h0m0s
usages:
- signing
- authentication
kind: InitConfiguration
localAPIEndpoint:
advertiseAddress: ${LOCALAPISERVER_IP}
bindPort: ${LOCALAPISERVER_PORT}
nodeRegistration:
criSocket: /var/run/dockershim.sock
name: ${LOCALAPIVERVER_NAME}
taints:
- effect: NoSchedule
key: node-role.kubernetes.io/master
---
apiServer:
certSANs:
- ${APISERVER_IP}
timeoutForControlPlane: 4m0s
apiVersion: kubeadm.k8s.io/v1beta2
certificatesDir: /etc/kubernetes/pki
clusterName: kubernetes
controllerManager: {}
dns:
type: CoreDNS
etcd:
local:
dataDir: /var/lib/etcd
imageRepository: ${k8SIMAGEREP}
kind: ClusterConfiguration
kubernetesVersion: v${K8SVERSION}
controlPlaneEndpoint: ${APISERVER_NAME}:${APISERVER_PORT}
networking:
dnsDomain: cluster.local
serviceSubnet: 10.96.0.0/12
podSubnet: ${SERVICE_SUBNET}
scheduler: {}
---
apiVersion: kubeproxy.config.k8s.io/v1alpha1
kind: KubeProxyConfiguration
featureGates:
SupportIPVSProxyMode: true
mode: ipvs
EOF
# (2) 初始化Master节点控制平面以及Worker加入的参数生成(# 根据您服务器网速的情况,您需要等候 3 - 10 分钟建议采用下面备注中的操作)
sudo kubeadm init --config=/home/weiyigeek/k8s-init/kubeadm-init-config.yaml --upload-certs | tee kubeadm_init.log
# [certs] Using certificateDir folder "/etc/kubernetes/pki"
# [certs] Generating "ca" certificate and key
# [certs] Generating "apiserver" certificate and key
# [certs] apiserver serving cert is signed for DNS names [weiyigeek-107 weiyigeek-lb-vip.k8s kubernetes kubernetes.default kubernetes.default.svc kubernetes.default.svc.cluster.local] and IPs [10.96.0.1 192.168.1.107 192.168.1.110]
# [certs] Generating "apiserver-kubelet-client" certificate and key
# [certs] Generating "front-proxy-ca" certificate and key
# [certs] Generating "front-proxy-client" certificate and key
# [certs] Generating "etcd/ca" certificate and key
# [certs] Generating "etcd/server" certificate and key
# [certs] etcd/server serving cert is signed for DNS names [weiyigeek-107 localhost] and IPs [192.168.1.107 127.0.0.1 ::1]
# [certs] Generating "etcd/peer" certificate and key
# [certs] etcd/peer serving cert is signed for DNS names [weiyigeek-107 localhost] and IPs [192.168.1.107 127.0.0.1 ::1]
# [certs] Generating "etcd/healthcheck-client" certificate and key
# [certs] Generating "apiserver-etcd-client" certificate and key
# [certs] Generating "sa" key and public key
# [kubeconfig] Using kubeconfig folder "/etc/kubernetes"
# [endpoint] WARNING: port specified in controlPlaneEndpoint overrides bindPort in the controlplane address
# [kubeconfig] Writing "admin.conf" kubeconfig file
# [endpoint] WARNING: port specified in controlPlaneEndpoint overrides bindPort in the controlplane address
# [kubeconfig] Writing "kubelet.conf" kubeconfig file
# [endpoint] WARNING: port specified in controlPlaneEndpoint overrides bindPort in the controlplane address
# [kubeconfig] Writing "controller-manager.conf" kubeconfig file
# [endpoint] WARNING: port specified in controlPlaneEndpoint overrides bindPort in the controlplane address
# [kubeconfig] Writing "scheduler.conf" kubeconfig file
# [kubelet-start] Writing kubelet environment file with flags to file "/var/lib/kubelet/kubeadm-flags.env"
# [kubelet-start] Writing kubelet configuration to file "/var/lib/kubelet/config.yaml"
# [kubelet-start] Starting the kubelet
# [control-plane] Using manifest folder "/etc/kubernetes/manifests"
# [control-plane] Creating static Pod manifest for "kube-apiserver"
# [control-plane] Creating static Pod manifest for "kube-controller-manager"
# [control-plane] Creating static Pod manifest for "kube-scheduler"
# [etcd] Creating static Pod manifest for local etcd in "/etc/kubernetes/manifests"
# [wait-control-plane] Waiting for the kubelet to boot up the control plane as static Pods from directory "/etc/kubernetes/manifests". This can take up to 4m0s
# [apiclient] All control plane components are healthy after 21.750931 seconds
# [upload-config] Storing the configuration used in ConfigMap "kubeadm-config" in the "kube-system" Namespace
# [kubelet] Creating a ConfigMap "kubelet-config-1.19" in namespace kube-system with the configuration for the kubelets in the cluster
# [upload-certs] Storing the certificates in Secret "kubeadm-certs" in the "kube-system" Namespace
# [upload-certs] Using certificate key:
# bb5b2f0b287d35e179ef4efawwww9f61a38f62343a9b06fc143e3b
# [mark-control-plane] Marking the node weiyigeek-107 as control-plane by adding the label "node-role.kubernetes.io/master=''"
# [mark-control-plane] Marking the node weiyigeek-107 as control-plane by adding the taints [node-role.kubernetes.io/master:NoSchedule]
# [bootstrap-token] Using token: 2021wq.httpweiyigeektop
# [bootstrap-token] Configuring bootstrap tokens, cluster-info ConfigMap, RBAC Roles
# [bootstrap-token] configured RBAC rules to allow Node Bootstrap tokens to get nodes
# [bootstrap-token] configured RBAC rules to allow Node Bootstrap tokens to post CSRs in order for nodes to get long term certificate credentials
# [bootstrap-token] configured RBAC rules to allow the csrapprover controller automatically approve CSRs from a Node Bootstrap Token
# [bootstrap-token] configured RBAC rules to allow certificate rotation for all node client certificates in the cluster
# [bootstrap-token] Creating the "cluster-info" ConfigMap in the "kube-public" namespace
# [kubelet-finalize] Updating "/etc/kubernetes/kubelet.conf" to point to a rotatable kubelet client certificate and key
# [addons] Applied essential addon: CoreDNS
# [endpoint] WARNING: port specified in controlPlaneEndpoint overrides bindPort in the controlplane address
# [addons] Applied essential addon: kube-proxy
Your Kubernetes control-plane has initialized successfully!
PS : 将该yaml文件复制到其他master节点,之后所有Master节点提前下载镜像,可以节省初始化时间:1
2
3
4
5
6
7
8
9
10
11# 方式1.配置文件上传到其他master节点
scp -P 20211 /home/weiyigeek/k8s-init/kubeadm-init-config.yaml weiyigeek@192.168.1.108:~/k8s-init/kubeadm-init-config.yaml
kubeadm config images pull --config /home/weiyigeek/k8s-init/kubeadm-init-config.yaml
# W0111 11:24:15.905316 5481 configset.go:348] WARNING: kubeadm cannot validate component configs for API groups [kubelet.config.k8s.io kubeproxy.config.k8s.io]
# [config/images] Pulled registry.cn-hangzhou.aliyuncs.com/google_containers/kube-apiserver:v1.19.6
# [config/images] Pulled registry.cn-hangzhou.aliyuncs.com/google_containers/kube-controller-manager:v1.19.6
# [config/images] Pulled registry.cn-hangzhou.aliyuncs.com/google_containers/kube-scheduler:v1.19.6
# [config/images] Pulled registry.cn-hangzhou.aliyuncs.com/google_containers/kube-proxy:v1.19.6
# [config/images] Pulled registry.cn-hangzhou.aliyuncs.com/google_containers/pause:3.2
# [config/images] Pulled registry.cn-hangzhou.aliyuncs.com/google_containers/etcd:3.4.13-0
# [config/images] Pulled registry.cn-hangzhou.aliyuncs.com/google_containers/coredns:1.7.0
Step 7.Kubernetes 集群访问配置
1 | # (1) 普通用户对集群访问配置文件设置 |
PS : 当没有安装第三方的 flannel或者calico网络插件
时候,通过kubectl get node 查看到节点状态是 NotReady ,当安装完成扁平化网络插件后, 如果没有其它意外则显示Ready
Step 8.现在应该将pod网络部署到集群,此处选用calico网络插件而非使用flannel插件
1 | # Run "kubectl apply -f [podnetwork].yaml" with one of the options listed at: |
Step 9.高可用Master初始化,将其他master节点加入集群控制平面
1 | sudo kubeadm join weiyigeek-lb-vip.k8s:16443 --token 20w21w.httpweiyigeektop \ |
Step 10.工作节点或者负载加入到集群中
1 | # (1) 为了便于工作节点快速接入到集群中,我们先把master中的镜像导入到工作节点 |
Step 11.集群状态查看 & 镜像查看
1 | # (1) Master 集群状态 |
0x04 高可用集群使用初体验
描述: 简单对nginx应用从镜像打包到部署到k8s集群中使用流程进行演示
- Step 1.编写dockerfile和相关脚本
$ cat dockerfile1
2
3
4
5
6
7FROM nginx
LABEL maintainer="Nginx Test Demo , Authorr: weiyigeek, Version: 2.2"
ENV PATH /usr/local/nginx/sbin:$PATH
ENV IMAGE_VERSION 2.2
COPY ./host.sh /
RUN chmod a+x /host.sh
ENTRYPOINT ["/host.sh"]
$ cat host.sh1
2
3
4
5
echo "Hostname: $HOSTNAME" > /usr/share/nginx/html/host.html
echo "Image Version: $IMAGE_VERSION" >> /usr/share/nginx/html/host.html
echo "Nginx Version: $NGINX_VERSION" >> /usr/share/nginx/html/host.html
sh -c "nginx -g 'daemon off;'"
- Step 2.镜像构建 & 上传到私有得Harbor仓库:
1
2
3
4
5
6$ docker build -t harbor.weiyigeek.top/test/nginx:v2.2 .
$ docker images | grep "v2.2"
# harbor.weiyigeek.top/test/nginx v2.2 b8a212b2bc88 10 hours ago 133MB
$ docker push harbor.weiyigeek.top/test/nginx:v2.2
# The push refers to repository [harbor.weiyigeek.top/test/nginx]
# v2.2: digest: sha256:4c49fc25d52e5331146699ff605561f59fb326505074c0474a3ce4898f0fcb02 size: 1776
- Step 3.部署镜像 & 查看:
方式11
2
3
4
5
6
7
8
9
10
11
12
13# 方式1.不推荐(配置标签以及标签选择需要添加参数,比较麻烦)
$ kubectl run nginx-deployment --image=harbor.weiyigeek.top/test/nginx:v2.2 --port=80
# pod/nginx-deployment created
$ kubectl get pod -o wide
# NAME READY STATUS RESTARTS AGE IP NODE NOMINATED NODE READINESS GATES
# nginx-deployment 1/1 Running 0 108s 10.244.1.2 k8s-node-4 <none> <none>
# 利用podSubnet进行查看
weiyigeek@ubuntu:~$ curl http://10.244.1.2/host.html
# Hostname: nginx-deployment
# Image Version: 2.2
# Nginx Version: 1.19.4
方式21
2
3
4
5
6
7
8
9
10
11
12
13
14
15
16
17
18
19
20
21
22
23
24
25
26
27
28
29
30
31
32
33
34
35
36
37
38
39
40cat > nginx-deployment.yaml <<'EOF'
apiVersion: apps/v1 #与k8s集群版本有关,使用 kubectl api-versions 即可查看当前集群支持的版本
kind: Deployment #该配置的类型,我们使用的是 Deployment
metadata: #译名为元数据,即 Deployment 的一些基本属性和信息
name: nginx-deployment #Deployment 的名称
namespace: default
labels: #标签可以灵活定位一个或多个资源,其中key和value均可自定义,可以定义多组,目前不需要理解
app: nginx #为该Deployment设置key为app,value为nginx的标签
spec: #这是关于该Deployment的描述,可以理解为你期待该Deployment在k8s中如何使用
replicas: 1 #使用该Deployment创建一个应用程序实例
selector: #标签选择器,与上面的标签共同作用,目前不需要理解
matchLabels: #选择包含标签app:nginx的资源
app: nginx
template: #这是选择或创建的Pod的模板
metadata: #Pod的元数据
labels: #Pod的标签,上面的selector即选择包含标签app:nginx的Pod
app: nginx
spec: #期望Pod实现的功能(即在pod中部署)
containers: #生成container,与docker中的container是同一种
- name: nginx #container的名称
image: harbor.weiyigeek.top/test/nginx:v2.2 #使用镜像nginx最新版本创建container,该container默认80端口可访问
EOF
$ kubectl apply -f nginx-deployment.yaml
# deployment.apps/nginx-deployment created
$ kubectl get deployment
# NAME READY UP-TO-DATE AVAILABLE AGE
# nginx-deployment 1/1 1 1 87s
# weiyigeek@ubuntu:~/nginx$ kubectl get pod
# NAME READY STATUS RESTARTS AGE
# nginx-deployment-7f5d9779c6-flmsf 1/1 Running 0 92s
# weiyigeek@ubuntu:~/nginx$ kubectl get pod -o wide
# NAME READY STATUS RESTARTS AGE IP NODE NOMINATED NODE READINESS GATES
# nginx-deployment-7f5d9779c6-flmsf 1/1 Running 0 99s 10.244.1.4 k8s-node-4 <none> <none>
~/nginx$ curl http://10.244.1.4/host.html
# Hostname: nginx-deployment-7f5d9779c6-flmsf
# Image Version: 2.2
# Nginx Version: 1.19.4
Step 4.Pod 副本 & 收缩 & 端口映射
1
2
3
4
5
6
7
8
9
10
11
12
13
14
15
16
17
18
19
20
21
22
23
24
25$ kubectl delete pod nginx-deployment-7f5d9779c6-flmsf
# pod "nginx-deployment-7f5d9779c6-flmsf" deleted
$ kubectl get pod -o wide
# NAME READY STATUS RESTARTS AGE IP NODE NOMINATED NODE READINESS GATES
# nginx-deployment-7f5d9779c6-hhl7k 1/1 Running 0 60s 10.244.1.5 k8s-node-4 <none> <none>
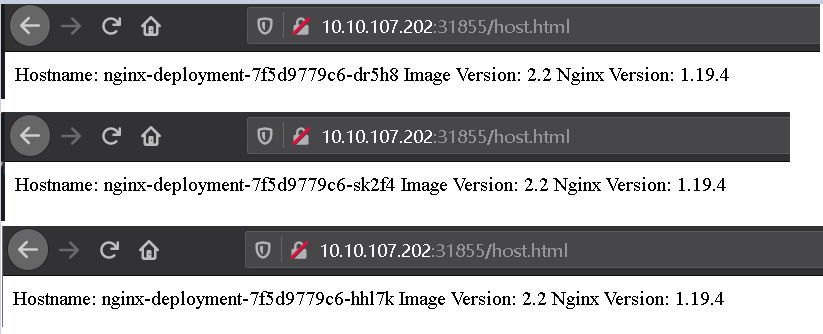
$ kubectl scale --replicas=3 deployment/nginx-deployment
# deployment.apps/nginx-deployment scaled
$ kubectl get pod -o wide
# NAME READY STATUS RESTARTS AGE IP NODE NOMINATED NODE READINESS GATES
# nginx-deployment-7f5d9779c6-dr5h8 1/1 Running 0 4s 10.244.1.7 k8s-node-4 <none> <none>
# nginx-deployment-7f5d9779c6-hhl7k 1/1 Running 0 109s 10.244.1.5 k8s-node-4 <none> <none>
# nginx-deployment-7f5d9779c6-sk2f4 1/1 Running 0 4s 10.244.1.6 k8s-node-4 <none> <none>
$ kubectl edit svc nginx-deployment # 第一章中有介绍 SVC,不知道回去看一哈
$ kubectl expose -f nginx-controller.yaml --port=80 --target-port=8000 --protocol=TCP --type=NodePort --node-port=31855 # 后续验证
$ kubectl expose svc nginx-deployment --port=80 --target-port=8000 --protocol=TCP --type=NodePort
# type: NodePort
$ kubectl get svc
# NAME TYPE CLUSTER-IP EXTERNAL-IP PORT(S) AGE
# kubernetes ClusterIP 10.96.0.1 <none> 443/TCP 2d22h
# nginx-deployment NodePort 10.99.90.247 <none> 30000:31855/TCP 39h
$ sudo netstat -anpt | grep "31855"
# tcp 0 0 0.0.0.0:31855 0.0.0.0:* LISTEN 1931726/kube-proxyStep 5.IPVS 负载均衡和rr轮询机制查看
1
2
3
4
5
6
7
8
9
10
11
12
13
14
15
16
17
18
19
20
21
22
23
24
25
26
27
28
29$ sudo ipvsadm -Ln
# IP Virtual Server version 1.2.1 (size=4096)
# Prot LocalAddress:Port Scheduler Flags
# -> RemoteAddress:Port Forward Weight ActiveConn InActConn
# TCP 10.10.107.202:31855 rr
# -> 10.244.1.5:80 Masq 1 0 1
# -> 10.244.1.6:80 Masq 1 1 1
# -> 10.244.1.7:80 Masq 1 0 1
# TCP 10.96.0.1:443 rr
# -> 10.10.107.202:6443 Masq 1 3 0
# TCP 10.96.0.10:53 rr
# -> 10.244.0.4:53 Masq 1 0 0
# -> 10.244.0.5:53 Masq 1 0 0
# TCP 10.96.0.10:9153 rr
# -> 10.244.0.4:9153 Masq 1 0 0
# -> 10.244.0.5:9153 Masq 1 0 0
# TCP 10.99.90.247:30000 rr
# -> 10.244.1.5:80 Masq 1 0 0
# -> 10.244.1.6:80 Masq 1 0 0
# -> 10.244.1.7:80 Masq 1 0 0
# TCP 127.0.0.1:31855 rr
# -> 10.244.1.5:80 Masq 1 0 0
# -> 10.244.1.6:80 Masq 1 0 0
# -> 10.244.1.7:80 Masq 1 0 0
# 基于RR轮训负载
Hostname: nginx-deployment-7f5d9779c6-dr5h8 Image Version: 2.2 Nginx Version: 1.19.4
Hostname: nginx-deployment-7f5d9779c6-sk2f4 Image Version: 2.2 Nginx Version: 1.19.4
Hostname: nginx-deployment-7f5d9779c6-hhl7k Image Version: 2.2 Nginx Version: 1.19.4

WeiyiGeek.rr轮休机制