[TOC]
0x01 secedit 命令 - 命令行中操作组策略计算机安全策略 描述:组策略是建立Windows安全环境的重要手段尤其是在Windows域环境下, 我们可以采用secedit 命令行操作组策略进行命令文本的方式下进行设置, 或者系统管理员肯定使用gpedit.msc在窗口界面下访问组策略。
weiyigeek.top-gpedit
组策略相关文件路径
组策略的计算机安全策略模板存放路径
%SYSTEMROOT%\security\templates
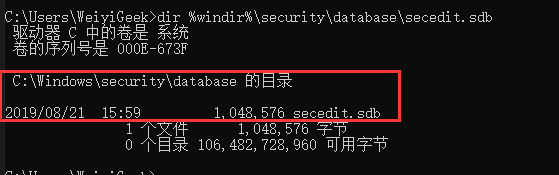
系统默认的安全数据库路径
%windir%\security\database\secedit.sdb
如果没有/log指定配置操作信息将被记录到scesrv.log
%windir%\security\logs目录之中
[TOC]
0x01 secedit 命令 - 命令行中操作组策略计算机安全策略 描述:组策略是建立Windows安全环境的重要手段尤其是在Windows域环境下, 我们可以采用secedit 命令行操作组策略进行命令文本的方式下进行设置, 或者系统管理员肯定使用gpedit.msc在窗口界面下访问组策略。
weiyigeek.top-gpedit
组策略相关文件路径
组策略的计算机安全策略模板存放路径
%SYSTEMROOT%\security\templates
系统默认的安全数据库路径
%windir%\security\database\secedit.sdb
如果没有/log指定配置操作信息将被记录到scesrv.log
%windir%\security\logs目录之中1 2 3 4 5 6 7 8 9 10 11 12 PS C:\Users\WeiyiGeek> ls C:\Windows\Security\Database\ 目录: C:\Windows\Security\Database Mode LastWriteTime Length Name ---- ------------- ------ ---- -a---- 2020/12/10 0:06 8192 edb.chk -a---- 2020/12/10 0:06 1048576 edb.log -a---- 2020/12/10 0:06 1048576 edb00001.log -a---- 2020/11/4 23:44 1048576 edbres00001.jrs -a---- 2020/11/4 23:44 1048576 edbres00002.jrs -a---- 2020/12/10 0:06 1048576 edbtmp.log -a---- 2020/12/10 0:06 16384 secedit.jfm -a---- 2020/12/10 9:00 1048576 secedit.sdb
weiyigeek.top-secedit.sdb
基础语法: 1 2 3 4 5 secedit [/configure | /analyze | /import | /export | /validate | /generaterollback] /quit 安静模式
/export 描述:允许你导出保存在数据库中的安全设置。
基础语法:1 2 3 4 5 6 7 8 9 10 11 12 13 14 15 secedit /export [/db filename] [/mergedpolicy] /cfg filename [/areas area1 area2...] [/log filename] /db filename - 指定要导出数据的数据库。如果没有指定,将使用系统安全数据库。 /cfg filename - 指定要导出数据库内容的安全模板。 /mergedpolicy - 合并并且导出域和本地策略安全设置。 /areas - 指定要应用到系统的安全性范围。如果没有指定此参数,在数据库中定义的所有安全性设置都将应用到系统中。 要配置多个范围,用空格将它们分开。下列安全性范围是受支持的: * SECURITYPOLICY - 包括帐户策略,审核策略,事件日志设置和安全选项。 * GROUP_MGMT - 包括受限制的组设置 * USER_RIGHTS - 包括用户权限分配 * REGKEYS - 包括注册表权限 * FILESTORE - 包括文件系统权限 * SERVICES - 包括系统服务设置 /log filename - 指定要记录导出操作状态的文件。
描述: 允许你用保存在数据库中的安全性设置来配置系统。
基础语法:1 2 3 4 5 6 secedit /configure /db filename [/cfg filename] [/overwrite][/areas area1 area2...] [/log filename] [/quiet] /overwrite - 指定在导入安全性模板前数据库应该被清空
/import 描述: 可将安全性模板导入到数据库以便模板中指定的设置可应用到系统或作为分析系统的依据。
基础语法:1 secedit /import /db FileName .sdb /cfg FileName.inf [/overwrite] [/areasArea1 Area2 ...] [/logFileName] [/quiet]
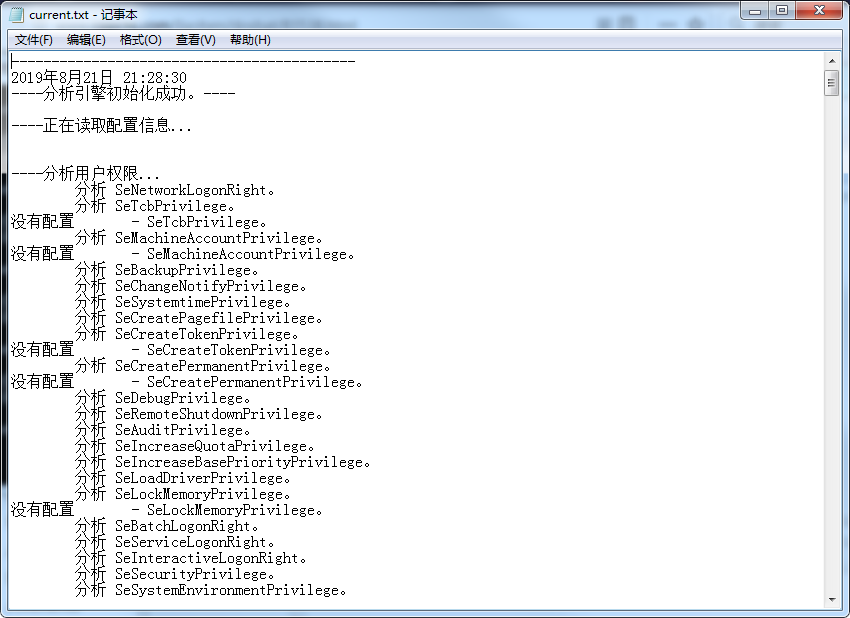
/analyze 描述: 可通过将其与数据库中的基本设置相比较,分析一台计算机上的安全设置。1 secedit /analyze /db FileName.sdb [/cfgFileName] [/overwrite] [/logFileName] [/quiet]
/GenereateRollback 描述:在将配置模板应用到计算机上时可以选择创建回滚模板,该模板在应用时会将安全性设置重置为应用配置模板前的值。(可根据配置模板生成一个回滚模板)
1
2
3
4
secedit /generaterollback /cfg filename /rbk filename [/log filename] [/quiet] /db filename - 指定执行复原操作使用的数据库。 /cfg filename - 指定一个将要生成关于它的复原模板的安全模板。安全模板是用安全模板管理单元创建的。 /rbk filename - 指定一个复原信息要写入的安全模板。安全模板是用安全模板管理单元创建的。
/validate 描述:验证要导入到分析数据库或系统应用程序的安全模板的语法,在不同的系统下执行配置文件中的参数是不同的;
基础语法:1 secedit /validate FileName
常用实例: 1 2 3 4 5 6 7 8 9 10 11 12 13 14 15 16 17 18 19 20 21 secedit /export /cfg secedit.inf /log secedit.log /quiet secedit /configure /db gp.sdb /cfg secedit.inf /overwrite /log gp.log /quiet secedit /import /db secedit.sdb /cfg secedit.inf secedit /import /db hisecws.sdb /cfg hisecws.inf /overwrite SecEdit.exe /validate .\secedit.cfg secedit /generaterollback /db hisecws.sdb /cfg hisecws.inf /rbk hisecwsrollback.inf /log hisecws.log secedit /analyze /db current.sdb /log result.txt
weiyigeek.top-
Tips : Built-In Local Groups (本地内置组查询)
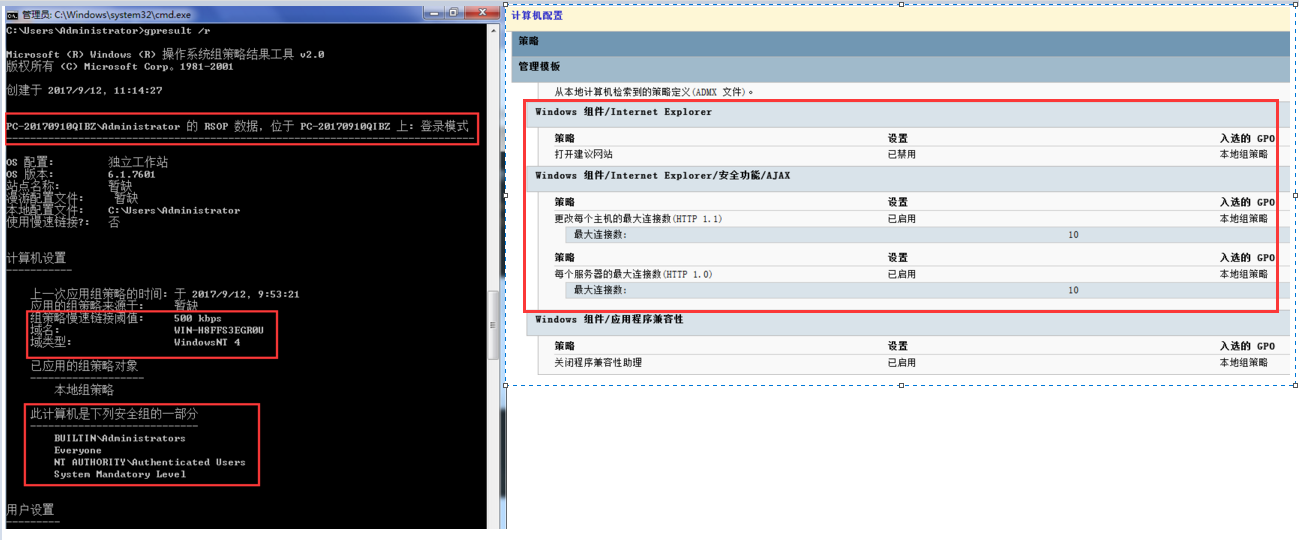
0x02 gpresult 命令 - 显示机器或用户的组策略信息 描述:Gpresult 显示机器或用户的组策略信息此命令行工具显示目标用户和计算机的策略结果集 (RSoP) 的信息
语法参数: 1 2 3 4 5 6 7 8 9 10 11 12 13 14 15 16 GPRESULT [/S system [/U username [/P [password]]]] [/SCOPE scope] [/USER targetusername] [/R | /V | /Z] [(/X | /H) <filename> [/F]] /S system 指定要连接到的远程系统。 /U [domain\]user 指定命令应在其下执行的用户上下文,无法与 /X、/H 一起使用。 /P [password] 为给定的用户上下文指定密码。如果省略则提示输入,无法与 /X、/H 一起使用。 /SCOPE scope 指定是显示用户还是计算机设置,有效值: "USER" ,"COMPUTER" 。 /USER [domain\]user 指定要显示 RSOP 的用户名称。 /R 显示 RSoP 摘要数据。 /V 指定要显示详细信息,详细信息提供已经应用的、优先权是 1 的详细设置。 /Z 指定显示超详细信息。超详细信息提供其他详细设置,用 1 或更高的优先权应用于此设置。这允许您查看是否在多处设置了某一设置。请参阅组策略联机帮助主题获得更多信息。 /X <filename> 以 XML 格式将报告保存该位置,并使用由<filename> 参数指定的文件名。(在 Windows Vista SP1 和更高版本以及 Windows Server 2008高版本中有效) /H <filename> 以 HTML 格式将报告保存该位置,并使用由 <filename> 参数指定的文件名。(在 WindowsVista SP1 和更高版本以及 Windows Server 2008高版本中有效) /F 强制 gpresult 覆盖在, /X 或 /H 命令中指定的文件名
基础实例: 1 2 3 4 5 6 7 8 9 10 11 12 13 14 15 16 17 18 19 20 21 22 23 24 25 26 27 28 29 30 31 32 33 34 35 36 37 38 39 40 41 42 43 44 45 46 47 48 49 50 51 52 53 54 55 56 57 58 59 gpresult /scope USER /z 已应用的组策略对象 ------------------- 本地组策略 用户是下列安全组的一部分 ------------------------ None Everyone 本地帐户和管理员组成员 BUILTIN\Administrators BUILTIN\Users NT AUTHORITY\INTERACTIVE 控制台登录 NT AUTHORITY\Authenticated Us This Organization 本地帐户 LOCAL NTLM Authentication High Mandatory Level 用户有下列安全特权 ------------------ 绕过遍历检查 管理审核和安全日志 备份文件和目录 还原文件和目录 更改系统时间 关闭系统 从远程系统强制关机 取得文件或其他对象的所有权 调试程序 修改固件环境值 配置文件系统性能 配置文件单个进程 提高计划优先级 加载和卸载设备驱动程序 创建一个页面文件 为进程调整内存配额 从扩展坞上取下计算机 执行卷维护任务 身份验证后模拟客户端 创建全局对象 更改时区 创建符号链接 增加进程工作集 GPRESULT /USER targetusername /V GPRESULT /S system /U username /P password /SCOPE USER /V gpresult /r GPRESULT /H GPReport.html
weiyigeek.top-
Tips: 附录脚本合规检查采用Bat方式,推荐使用博主的PowerShell进行合规检测。1 2 3 4 5 6 7 8 9 10 11 12 13 14 15 16 17 18 19 20 21 22 23 24 25 26 27 28 29 30 31 32 33 34 35 36 37 38 39 if exist no.txt (del no.txt) cls echo 正在进行 "审计与帐户策略” 安全检查echo > list.txt PasswordComplexity = 1 echo >> list.txt MinimumPasswordLength = 8 echo >> list.txt MaximumPasswordAge = 42 echo >> list.txt MinimumPasswordAge = 1 echo >> list.txt PasswordHistorySize = 5 echo >> list.txt ClearTextPassword = 0 echo >> list.txt ResetLockoutCount = 15 echo >> list.txt LockoutDuration = 15 echo >> list.txt LockoutBadCount = 15 echo >> list.txt AuditPolicyChange = 3 echo >> list.txt AuditLogonEvents = 3 echo >> list.txt AuditObjectAccess = 3 echo >> list.txt AuditPrivilegeUse = 0 echo >> list.txt AuditProcessTracking = 0 echo >> list.txt AuditDSAccess = 0 echo >> list.txt AuditSystemEvents = 3 echo >> list.txt AuditAccountLogon = 3 echo >> list.txt AuditAccountManage = 3 secedit /export /cfg model.inf >nul for /F "tokens=1 ,3 " %%i in (list.txt) do (call :Getgp %%i %%j ) ping 127 .0 .0 .1 /n 2 >nul del tmp.txtdel list.txtdel model.infgoto :EOF:Getgp find "%1 " model.inf >tmp.txtfor /f "skip=2 tokens=3 " %%i in (tmp.txt) do (if "%%i ”==”%2 " (echo %1=% %i ok) else (echo %1 策略不符合规则>>bad.txt)) goto :EOF
补充说明:
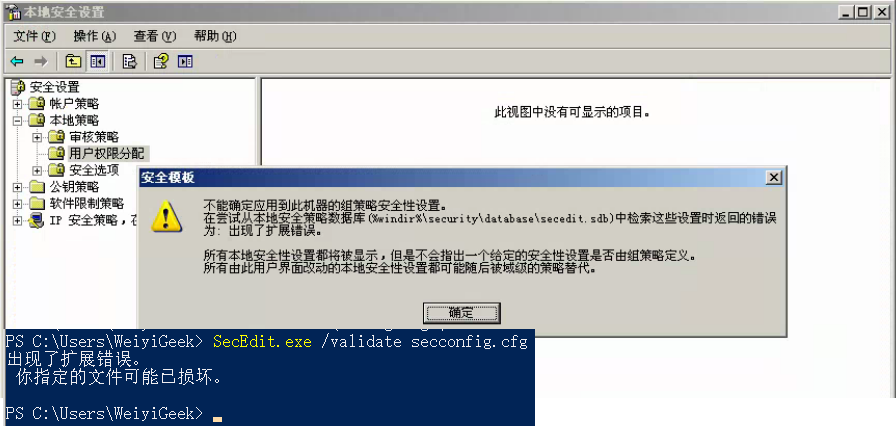
0x0n 入坑&出坑 1.修改本地安全设置的ini文件后采用secedit导入本地安全策略出现了扩展性错误。
错误表现: 1) 服务器查看相关的安全性策略的配置,发现修改某一个设置后通过本地的gpedit.msc打开本地安全策略就报了这个错误 2) 在SecEdit.exe /validate secconfig.cfg验证我们修改过的文件.1 2 3 PS C:\Users\WeiyiGeek> SecEdit.exe /validate secconfig.cfg 出现了扩展错误。 你指定的文件可能已损坏。
weiyigeek.top-出现了扩展性错误
问题原因: 我修改后的secconfig.cfg策略文件其编码是UTF-8而非 UTF-16 LE格式。解决办法: 1) 手动将内容复制到secedit /export /cfg config.cfg /quiet生成的config.cfg 2) 采用PS不指定编码格式Get-Content secconfig.cfg | Out-File test.cfg。1 2 3 4 5 6 7 8 9 10 11 12 13 14 15 16 * esentutl /k %windir%\Security\Database\Secedit.sdb * esentutl /g %windir%\Security\Database\Secedit.sdb * esentutl /p %windir%\Security\Database\Secedit.sdb * 1.Open the %SystemRoot%\Security folder, create a new folder, and then name it "OldSecurity" . * 2.Move all of the files ending in .log from the %SystemRoot%\Security folder to the OldSecurity folder. * 3.Find the Secedit.sdb file in the %SystemRoot%\Security\Database folder, and then rename this file to "Secedit.old" . * 4.Click Start, click Run, type mmc, and then click OK. * 5.Click Console, click Add/Remove Snap-in, and then add the Security and Configuration snap-in. * 6.Right-click Security and Configuration and Analysis, and then click Open Database. * 7.Browse to the %SystemRoot%\Security\Database folder, type Secedit.sdb in the File name box, and then click Open. * 8.When you are prompted to import a template, click Setup Security.inf, and then click Open.