[TOC]
0x00 前言简述 InfluxDB 介绍 Q: 什么是InfluxDB?
InfluxDB 采用Go语言开发是一个开源时间序列平台, 是一个可编程且高性能的时间序列数据库,具有跨 OSS、云和企业产品的通用 API。
Q: InfluxDB 有何用?
Q: InfluxDB 时间序列平台的优点有那些?
用于实时应用程序的强大 API 和 工具集, 可以用你喜欢的语言(InfluxDB API、Arduino、C#、Go、Java、JavaScript、Kotlin、Node.js、PHP、Python、R、Ruby、Scala 和 Swift)编写代码
高性能时间序列引擎
庞大的云和开源开发人员社区
内存占用较少
Q: 版本区别说明
[TOC]
0x00 前言简述 InfluxDB 介绍 Q: 什么是InfluxDB?
InfluxDB 采用Go语言开发是一个开源时间序列平台, 是一个可编程且高性能的时间序列数据库,具有跨 OSS、云和企业产品的通用 API。
Q: InfluxDB 有何用?
Q: InfluxDB 时间序列平台的优点有那些?
用于实时应用程序的强大 API 和 工具集, 可以用你喜欢的语言(InfluxDB API、Arduino、C#、Go、Java、JavaScript、Kotlin、Node.js、PHP、Python、R、Ruby、Scala 和 Swift)编写代码
高性能时间序列引擎
庞大的云和开源开发人员社区
内存占用较少
Q: 版本区别说明 1 2 3 4 5 show databases; influx write -b primary -o primary -p 't01,building=boli,floor=702a temp=24.51651036342'
温馨提示: 2019 年 1 月 11 日左右,这个仓库上的 master 将成为 InfluxDB 2.0 代码,infludata/platform 的内容将移至此存储库。如果你依赖于 master,你应该更新你的依赖来跟踪 maxter-1.x 分支。
温馨提示: InfluxDB 1.x 数据存储在数据库(database)中,InfluxDB OSS 2.2中,数据存储在桶(bucket)中。
InfluxDB 参考来源 influxdb 官网地址: https://influxdata.com/ https://docs.influxdata.com/influxdb/latest/introduction/get-started/ https://github.com/influxdata/influxdb/releases https://github.com/influxdata/influx-cli
0x01 安装部署 描述: 我们可以采用多种方式进行安装部署 InfluxData , 例如 Docker 映像、Debian 包、RPM 包和 InfluxDB 的压缩包等方式安装。
使用 Docker 安装 IndluxDB 2.x 安装步骤 1 2 3 4 5 6 7 8 9 10 11 12 13 14 15 16 17 mkdir /opt/influxdb-docker-data-volume && cd $_ docker run --name influxdb2 -d -p 8086:8086 \ -e DOCKER_INFLUXDB_INIT_MODE=setup \ -e DOCKER_INFLUXDB_INIT_USERNAME=admin \ -e DOCKER_INFLUXDB_INIT_PASSWORD=weiyigeek.top \ -e DOCKER_INFLUXDB_INIT_ORG=weiyigeek \ -e DOCKER_INFLUXDB_INIT_BUCKET=primary \ --volume $PWD :/var/lib/influxdb2 \ influxdb:2.2.0 DOCKER_INFLUXDB_INIT_MODE=setup DOCKER_INFLUXDB_INIT_USERNAME=admin DOCKER_INFLUXDB_INIT_PASSWORD=password DOCKER_INFLUXDB_INIT_ORG=org DOCKER_INFLUXDB_INIT_BUCKET=bucket
参考地址:
使用 Helm 在 Kubernetes 安装 InfluxDB 2.x 描述: 此处为了方便快捷安装部署influxdb,我在Kubernetes集群环境中采用helm方式(安装使用请参考【 https://blog.weiyigeek.top/2021/6-10-617.html 】)进行InfluxData的安装部署。
实践操作 1 2 3 4 5 helm repo add bitnami https://charts.bitnami.com/bitnami helm repo update && helm search repo influxdb helm show values bitnami/influxdb > influxdb.yml
步骤 03.执行如下命令安装influxdb需指定修改后的Chart图表相关values的influxdb.yml文件。1 2 3 4 5 6 7 8 9 10 11 helm install prometheus-influxdb bitnami/influxdb -f influxdb.yml --version 5.3.1 -n devtest --debug --create-namespace InfluxDB™: prometheus-influxdb.devtest.svc.cluster.prod (port 8086) InfluxDB™ Prometheus Metrics: prometheus-influxdb-metrics.devtest.svc.cluster.prod (port 9122) kubectl run prometheus-influxdb-client --rm --tty -i --restart='Never' --namespace devtest \ --image docker.io/bitnami/influxdb:2.2.0-debian-10-r41 --privileged=true \ --command -- bash kubectl port-forward svc/prometheus-influxdb 8086:8086
步骤 04.验证部署的influxdb的Pod以及Service,然后进入prometheus-influxdb的Pod里shell终端中.1 2 3 4 5 6 7 8 9 10 kubectl get pod,svc -n devtest -l app.kubernetes.io/component=influxdb kubectl exec -n devtest -it prometheus-influxdb-5fbc6d5f9d-ww6ck -- bash I have no name!@prometheus-influxdb-5fbc6d5f9d-ww6ck:/$
步骤 06.在prometheus-influxdb-5fbc6d5f9d-ww6ck终端中执行influx命令。1 2 3 4 5 6 7 8 9 10 11 12 13 14 15 16 17 18 19 20 21 22 23 24 25 26 27 28 29 30 31 32 33 34 35 36 37 38 39 40 41 42 43 44 45 46 47 48 49 50 51 52 53 54 55 56 57 58 59 60 61 62 63 64 65 66 67 68 69 70 71 72 73 74 75 76 77 78 79 80 81 82 83 84 85 86 87 88 89 90 I have no name!@prometheus-influxdb-5fbc6d5f9d-ww6ck:/$ env | egrep "^INFLUXDB" INFLUXDB_ADMIN_USER_TOKEN=1VreF2TZuek7V6hmnquF INFLUXDB_ADMIN_ORG=primary INFLUXDB_CREATE_USER_TOKEN=no INFLUXDB_ADMIN_USER=admin INFLUXDB_HTTP_AUTH_ENABLED=true INFLUXDB_ADMIN_BUCKET=primary INFLUXDB_ADMIN_USER_PASSWORD=iSzWSexDso $ influx version Influx CLI dev (git: none) build_date: 2022-04-11T15:46:15Z $ influx ping OK $ influx server-config { "assets-path" : "" , "bolt-path" : "/bitnami/influxdb/influxd.bolt" , "e2e-testing" : false , "engine-path" : "/bitnami/influxdb" , "feature-flags" : null, "flux-log-enabled" : false , "hardening-enabled" : false , "http-bind-address" : "0.0.0.0:8086" , "http-idle-timeout" : 180000000000, "http-read-header-timeout" : 10000000000, "http-read-timeout" : 0, "http-write-timeout" : 0, "influxql-max-select-buckets" : 0, "influxql-max-select-point" : 0, "influxql-max-select-series" : 0, "log-level" : "info" , "metrics-disabled" : false , "nats-max-payload-bytes" : 0, "nats-port" : 0, "no-tasks" : false , "pprof-disabled" : false , "query-concurrency" : 1024, "query-initial-memory-bytes" : 0, "query-max-memory-bytes" : 0, "query-memory-bytes" : 0, "query-queue-size" : 1024, "reporting-disabled" : false , "secret-store" : "bolt" , "session-length" : 60, "session-renew-disabled" : false , "sqlite-path" : "/bitnami/influxdb/influxd.sqlite" , "storage-cache-max-memory-size" : 1073741824, "storage-cache-snapshot-memory-size" : 26214400, "storage-cache-snapshot-write-cold-duration" : "10m0s" , "storage-compact-full-write-cold-duration" : "4h0m0s" , "storage-compact-throughput-burst" : 50331648, "storage-max-concurrent-compactions" : 0, "storage-max-index-log-file-size" : 1048576, "storage-no-validate-field-size" : false , "storage-retention-check-interval" : "30m0s" , "storage-series-file-max-concurrent-snapshot-compactions" : 0, "storage-series-id-set-cache-size" : 0, "storage-shard-precreator-advance-period" : "30m0s" , "storage-shard-precreator-check-interval" : "10m0s" , "storage-tsm-use-madv-willneed" : false , "storage-validate-keys" : false , "storage-wal-fsync-delay" : "0s" , "storage-wal-max-concurrent-writes" : 0, "storage-wal-max-write-delay" : 600000000000, "storage-write-timeout" : 10000000000, "store" : "disk" , "testing-always-allow-setup" : false , "tls-cert" : "" , "tls-key" : "" , "tls-min-version" : "1.2" , "tls-strict-ciphers" : false , "tracing-type" : "" , "ui-disabled" : false , "vault-addr" : "" , "vault-cacert" : "" , "vault-capath" : "" , "vault-client-cert" : "" , "vault-client-key" : "" , "vault-client-timeout" : 0, "vault-max-retries" : 0, "vault-skip-verify" : false , "vault-tls-server-name" : "" , "vault-token" : "" }
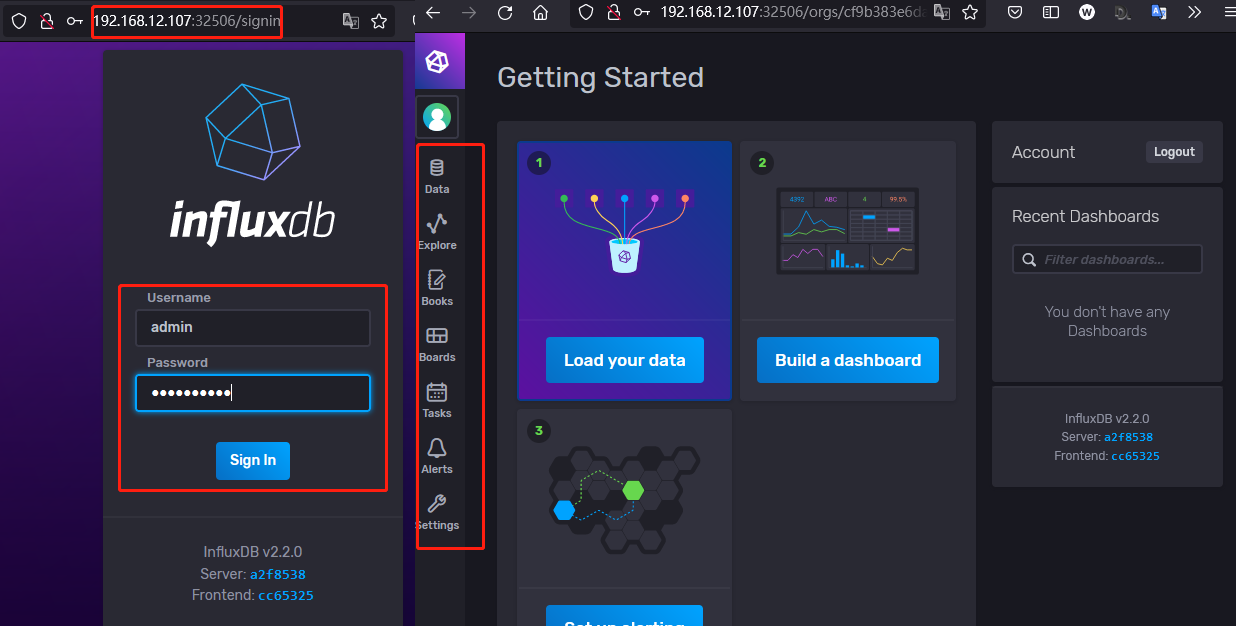
步骤 07.查看influxdb提供的UI界面, 此处我们可编辑svc将其通过NodePort方式保留服务, 也可通过port-forward临时转发其服务端口, 然后便可通过浏览器访问mater节点+32506端口进行访问。1 2 3 4 5 6 7 8 9 $ kubectl edit svc -n devtest prometheus-influxdb $ kubectl get svc -n devtest prometheus-influxdb NAME TYPE CLUSTER-IP EXTERNAL-IP PORT(S) AGE prometheus-influxdb NodePort 10.98.134.121 <none> 8086:32506/TCP,8088:30441/TCP 6d3h kubectl port-forward -n devtest --address 0.0.0.0 svc/prometheus-influxdb 32506:8086
温馨提示: 此处登陆密码为前面env环境中获取的INFLUXDB_ADMIN_USER与INFLUXDB_ADMIN_USER_PASSWORD环境变量值(admin/iSzWSexDso)。
weiyigeek.top-influxdb-UI
步骤 08.安装并使用客户端工具连接创建的prometheus-influxdb远程influxdb数据库。1 2 3 4 5 6 7 8 9 10 11 12 13 14 15 kubectl run prometheus-influxdb-client --namespace devtest --rm --tty -i --restart='Never' --image docker.io/bitnami/influxdb:2.2.0-debian-10-r41 --privileged=true -- bash wget -c https://dl.influxdata.com/influxdb/releases/influxdb2-client-2.3.0-linux-amd64.tar.gz && tar -zxvf influxdb2-client-2.3.0-linux-amd64.tar.gz cp influxdb2-client-2.3.0-linux-amd64/influx /usr/local /bin/influx source <(influx completion bash)source <(influx completion zsh)Invoke-Expression ((influx completion powershell) -join "`n`" )
温馨提示: 在V2.x版本及其之后客户端工具已经从influxdb中分离开成为一个独立的项目(https://github.com/influxdata/influx-cli/)。
温馨提示: 如果希望自动补全在其它shell会话中也可以将该命令加入到~/.bash_profile文件中使得下次打开shell终端可以自动补全。1 2 3 4 tee -a ~/.bash_profile <<'EOF' source <(influx completion bash)EOF source ~/.bash_profile
步骤 09.安装完成后使用 influx命令 添加需要连接的 influxdb 数据库。1 2 3 4 5 6 7 8 9 10 11 12 13 14 15 16 17 18 19 20 21 22 influx config create -a -n prometheus-influxdb -t 1VreF2TZuek7V6hmnquF -o primary -u http://prometheus-influxdb:8086 influx config create -a -n prometheus-influxdb -t 1VreF2TZuek7V6hmnquF -o primary -u http://10.98.134.121:8086 $ influx config Active Name URL Org * prometheus-influxdb http://10.98.134.121:8086 primary $ influx ping OK $ influx config rm prometheus-influxdb Active Name URL Org Deleted * prometheus-influxdb http://10.98.134.121:8086 true
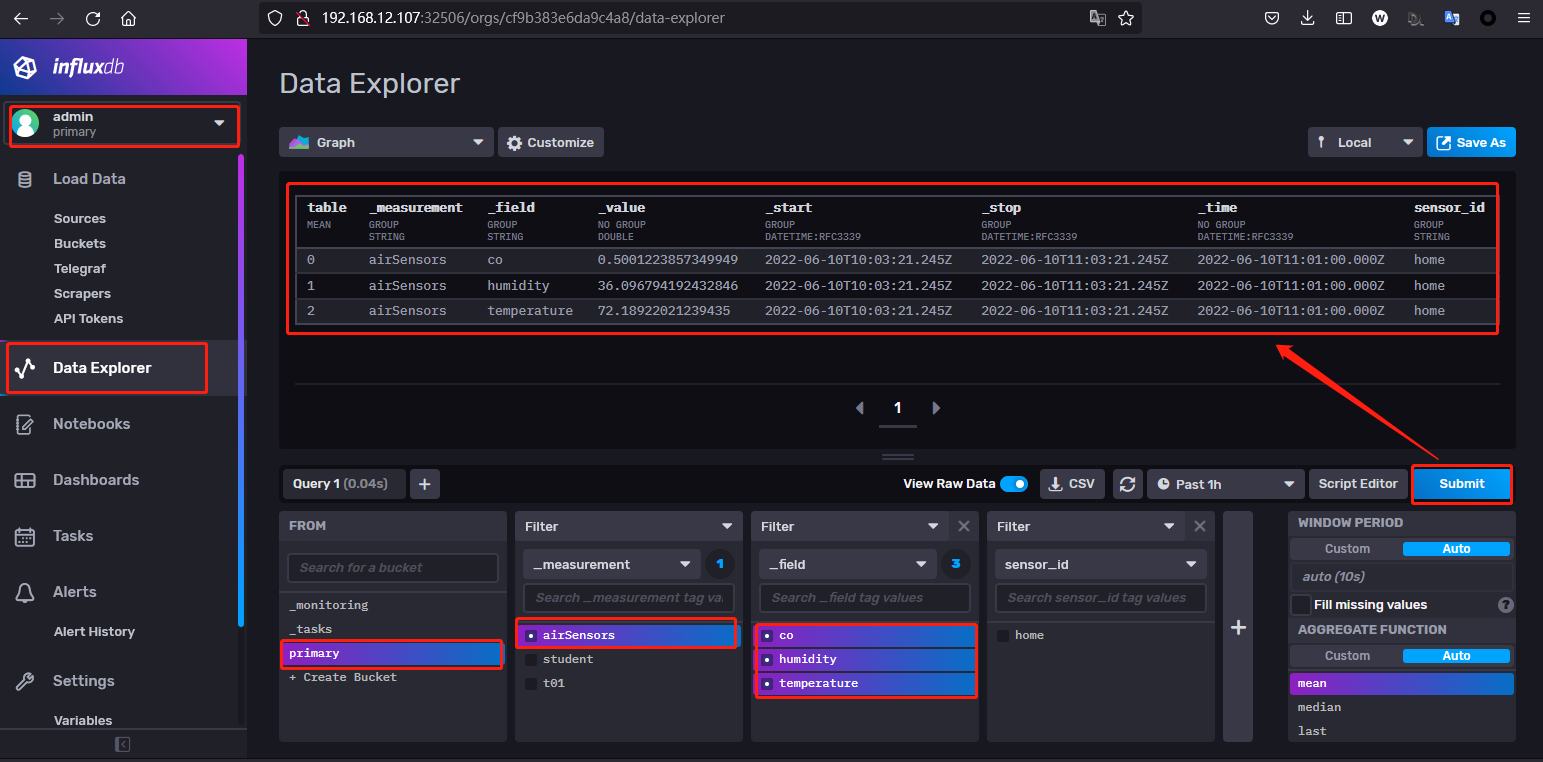
步骤 10.influx 2.x 数据库数据增删改查。1 2 3 4 5 6 7 influx write -b primary -o primary 'airSensors,sensor_id=home temperature=71.18922021239435,humidity=35.096794192432846,co=0.49012238573499495' influx write -b primary -o primary 'airSensors,sensor_id=home temperature=72.18922021239435,humidity=36.096794192432846,co=0.50012238573499495' influx write -b primary -o primary 'airSensors,sensor_id=home temperature=73.18922021239435,humidity=37.096794192432846,co=0.51012238573499495' influx delete -b primary -o primary -p sensor_id=home --start '2022-06-05T08:26:39.455Z' --stop '2022-06-10T09:50:39.455Z'
weiyigeek.top-利用Influxdb中DataExplorer查看插入的数据
温馨提示: 使用 influx query 命令后如果想要退出查询, 则可以按下 ctrl + d。
使用 kubectl 在 Kubernetes 部署 InfluxDB 1.X 描述: 在k8s集群中可能我们常常会使用kubectl客户端工具指定资源清单的进行apply以部署相应资源,此处我们将演示以资源清单方式部署 InfluxDB 1.X。
温馨提示: 当前【2022年6月7日 19:51:14】1.X 最新的InfluxDB版本为 1.8.10。
步骤 01.准备的部署influxdb的资源清单如下:1 2 3 4 5 6 7 8 9 10 11 12 13 14 15 16 17 18 19 20 21 22 23 24 25 26 27 28 29 30 31 32 33 34 35 36 37 38 39 40 41 42 43 44 45 46 47 48 49 50 51 52 53 54 55 56 57 58 59 60 61 62 63 64 65 66 67 68 69 70 71 72 73 74 75 76 77 tee influxdb-Deployment.yaml <<'EOF' apiVersion: v1 kind: Service metadata: labels: app: influxdb name: influxdb spec: ports: - name: http nodePort: 30083 port: 8083 protocol: TCP targetPort: 8083 - name: api nodePort: 30083 port: 8086 protocol: TCP targetPort: 8086 - name: graphite nodePort: 30003 port: 2003 protocol: TCP targetPort: 2003 selector: app: influxdb sessionAffinity: None type: NodePort --- apiVersion: apps/v1 kind: Deployment metadata: name: influxdb labels: app: influxdb spec: replicas: 1 selector: matchLabels: app: influxdb template: metadata: labels: app: influxdb spec: containers: - image: influxdb:1.8.10 imagePullPolicy: IfNotPresent name: influxdb ports: - containerPort: 8083 name: influx protocol: TCP - containerPort: 8086 name: api protocol: TCP - containerPort: 2003 name: graphite protocol: TCP volumeMounts: - mountPath: /etc/influxdb name: config-volume - mountPath: /var/lib/influxdb/ name: data restartPolicy: Always terminationGracePeriodSeconds: 30 volumes: - name: config-volume configMap: defaultMode: 420 name: influxdb-config - name: data hostPath: path: /nfsdisk-31/datastore/influxdb/data type: DirectoryOrCreate EOF
步骤 02.准备influxdb使用的配置文件并存放到configMap资源控制器下。1 2 3 4 5 6 7 8 9 10 11 12 13 14 15 16 17 18 tee influxdb.conf <<'EOF' [meta] dir = "/var/lib/influxdb/meta" [data] dir = "/var/lib/influxdb/data" engine = "tsm1" wal-dir = "/var/lib/influxdb/wal" [[graphite]] enabled = true bind -address = ":2003" database = "appdb" EOF $ kubectl create cm influxdb-config --from-file=influxdb.conf configmap/influxdb-config created
步骤 03.使用kubectl工具按照influxdb-Deployment.yaml资源清单中的内容进行安装部署, 并且查看其部署情况。1 2 3 4 5 6 7 8 9 10 $ kubectl apply -f influxdb-Deployment.yaml $ kubectl get pod,svc -l app=influxdb
步骤 04.进入到influxdb-f54d77bc6-cp46r的Pod容器内部shell终端,并使用influx客户端连接到默认的 influxdb 服务端口上。
1 2 3 4 5 6 7 8 9 10 11 12 13 14 15 16 17 18 19 20 21 22 23 24 25 26 27 28 29 30 31 32 33 34 35 36 37 38 39 40 41 42 43 44 45 46 47 48 49 50 51 52 53 54 55 56 57 58 $ kubectl exec -it influxdb-f54d77bc6-cp46r bash root@influxdb-f54d77bc6-cp46r:/ Connected to http://localhost:8086 version 1.8.10 InfluxDB shell version: 1.8.10 > help Usage: connect <host:port> connects to another node specified by host:port auth prompts for username and password pretty toggles pretty print for the json format chunked turns on chunked responses from server chunk size <size> sets the size of the chunked responses. Set to 0 to reset to the default chunked size use <db_name> sets current database format <format> specifies the format of the server responses: json, csv, or column precision <format> specifies the format of the timestamp: rfc3339, h, m, s, ms, u or ns consistency <level> sets write consistency level: any, one, quorum, or all history displays command history settings outputs the current settings for the shell clear clears settings such as database or retention policy. run 'clear' for help exit /quit/ctrl+d quits the influx shell show databases show database names show series show series information show measurements show measurement information show tag keys show tag key information show field keys show field key information > create user "root" with password 'weiyigeek.top' with all privileges > show databases name: databases name ---- _internal > create database "jmeter" > use jmeter Using database jmeter > show MEASUREMENTS name: measurements name ---- Upgrade-Insecure-Requests: events > select * from events name: events time application text title ---- ----------- ---- ----- 1654483349859000000 nginx Test name started ApacheJMeter 1654483351852000000 nginx Test name ended ApacheJMeter
0x02 InfluxDB2.X 数据查询 描述: 在 InfluxDB2.x 中提供了两种语法查询数据,Flux 和 InfluxQL。
Flux - 功能给你性脚本语言 描述: Flux 一门新的功能性数据脚本语言(Flux Script),旨在将查询、处理、分析和对数据的操作统一为一个语法,这里仅介绍针对查询需要的一些常用函数和操作,了解更多Flux见Flux官方文档。
基础规定, 每个查询语句必须包含数据源,时间区间和过滤器, 对应关键字分别为 from,range,filter。实际上不包含filter也是可以的,可以理解为filter过滤条件就是all,所以说Flux查询遵循如下几个步骤.
指定数据源
时间范围
过滤数据
对数据整形、聚合函数(重新组织数据结构)
输出结果
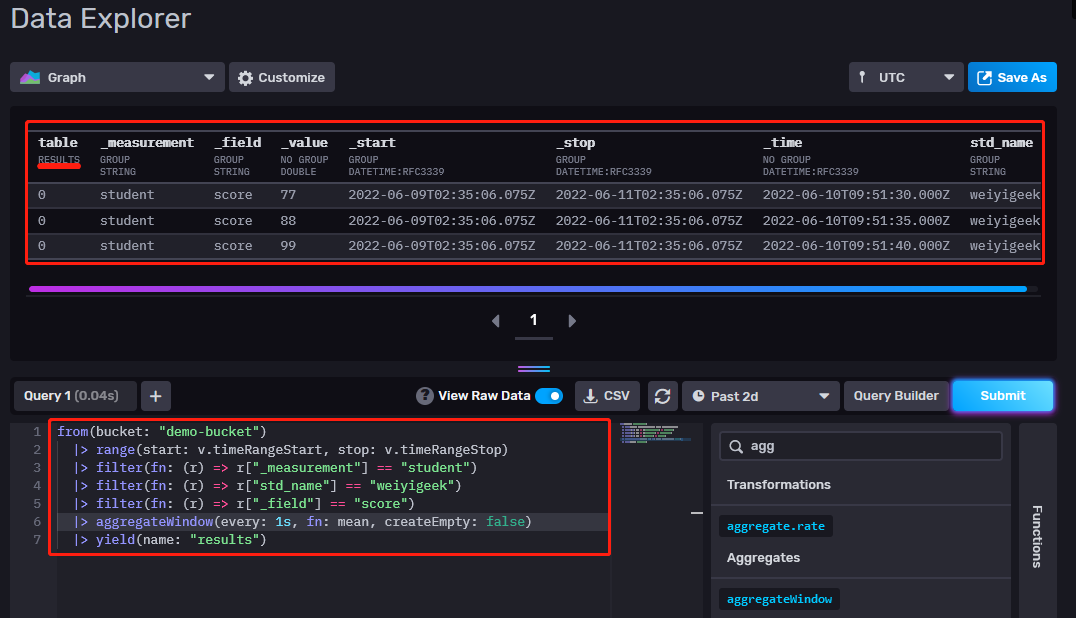
1 2 3 4 5 6 7 8 9 10 11 12 13 14 15 16 17 18 from(bucket: "demo-bucket" ) |> range(start: -1d) |> range(start: 2022-06-10T02:20:10.765Z, stop: 2022-06-11T02:20:10.765Z ) |> filter(fn: (r) => r["_measurement" ] == "student" ) |> filter(fn: (r) => r["std_name" ] == "weiyigeek" ) |> filter(fn: (r) => r["_field" ] == "score" ) |> aggregateWindow(every: 1s, fn: mean, createEmpty: false ) |> yield(name: "results" )
weiyigeek.top-使用Flux进行influxDB数据查询
Flux 标准库(部分)
buckets() :返回当前组中所有的桶
from(bucket: “demo-bucket”) : 指定从那个bucket查询数据
range() : 指定时间区间range接收两个参数start和stop, 其中stop可以省略缺省值是当前时间,而start不能省略否则会报语法错误。
1 2 3 4 5 6 from(bucket:"weiyigeek" ) |> range(start: -1h) from(bucket:"weiyigeek" ) |> range(start: 2021-01-01T00:00:00Z, stop: 2021-01-01T12:00:00Z)
filter() : 对数据进行过滤,接收一个判断函数,其类似于类似于java中的lamda, 例如(r) => (r.recordProperty comparisonOperator comparisonExpression)。
1 2 3 4 5 6 7 from(bucket:"demo" ) |> range(start: -1h) |> filter(fn: (r)=>(r.owner=="weiyigeek" )) |> filter(fn: (r)=>(r.owner=="weiyigeek" or r["std_name" ] == "weiyigeek" )
contains(value, set) :判断value是否包含在set中。
1 2 3 4 5 fiels = ["tencent" ,"ali" ] from(bucket: "demo" ) |> range(start: 2022-03-12T08:14:04Z,stop:2022-03-13T08:19:05Z) |> filter(fn: (r) => contains(value:r.owner,set :fiels))
window(very, period, offset) : 该函数根据时间将数据分组。
very 指定每个时间窗口的时间,例如 every = 5 那么 时间窗口可以是 0m-5m,5m-10m,10m-15m。默认为 period 的值
min() : column 求最小值的列默认为_value , 取每个分组中最小值
max() : column 求最大值的列默认为_value , 取每个分组中最大值
1 2 3 4 5 6 7 from(bucket: "demo-bucket" ) |> range(start: v.timeRangeStart, stop: v.timeRangeStop) |> filter(fn: (r) => r["_measurement" ] == "student" and r._field == "score" ) |> max() |> yield(name: "mean" )
bottom(n:10, columns: [“_value”]) :根据columns进行排序并返回最上层n条记录。
count(column: “_value”) :统计_value列中的数据个数。
columns(column: “_value”) : 返回所有列标签名并存储在指定的列中默认为_value 通过column参数指定.
cumulativeSum(columns: [“_value”]) : 根据给定列对该列数据进行累加,模拟输出忽略 _start, _stop 等列.
1 2 3 4 5 6 7 8 9 10 11 12 13 _measurement _field 62 temperature wxm 62 temperature wxm 65 temperature wxm 81.5 temperature wxm 81.5 _measurement _field 62 temperature wxm 62 temperature wxm 127 temperature wxm 208.5 temperature wxm 290
group(columns: [“host”, “_measurement”], mode:”by”) : 按那些列进行分组操作默认值为[]。
1 2 3 - "by" , 按columns内指定的列进行分组. - "expect" , 按除了columns列中指定的列进行分组.
derivative(unit: 1s, nonNegative: true, columns: [“_value”], timeColumn: “_time”) :计算后续非空记录之间每单位时间的更改率。输出表架构将与输入表相同
unit 求多长时间内的变化速率。变化速率=(下一个值-上一个值)/(下一个时间-上一个时间)* unit 默认值1s
difference(nonNegative: false, columns: [“_value”]) : 计算指定列中后续非null记录之间的差异。
nonNegative 是否允许差值为负数,如果是负数influxdb会假定前一个值为0 默认值false, 计算相邻两行的差值(next-pre)
distinct(column: “host”): 按指定列去重.
InfluxQL - 关系型数据库查询 描述: InfluxDB 1.x数据存储在数据库(database)中,InfluxDB OSS 2.2中,数据存储在桶(bucket)中, 由于InfluxQL使用了1.x数据模型,在使用InfluxQL进行查询之前,必须将桶映射到一个数据库和保留策略(DBRP)。可以这样理解 InfluxQL 只有数据库才能使用,如果想要在桶上也能使用只有将桶映射成数据库。
使用InfluxQL查询桶数据,需要完成以下步骤:
1、确认桶有映射;
2、映射未映射的桶;
3、使用InfluxQL查询已映射的桶;
1 2 3 4 5 6 7 8 9 10 11 12 13 14 15 16 17 18 19 20 21 22 23 24 25 26 27 28 29 30 31 32 33 34 influx v1 dbrp list influx v1 dbrp list --bucket-id 04deb39109ae7bc6 $ influx bucket ls -o demo -n demo-bucket $ influx v1 dbrp create \ --db test_db \ --rp test_rp \ --bucket-id 2d0184d3af5ec8b2 \ --org demo \ --default curl --get \ "http://10.98.134.121:8086/query" \ --header "Authorization: Token nxlkweOIxTOYQhNzI4QtuBHrKQtyOLFkA2KzJsBpO71hxZT7i6rmdyIgSuexuKbda1qL9x8vjJWUUH5rzBleKA==" \ --data-urlencode "q=SELECT * FROM test_db.test_rp.hobby" influx v1 dbrp delete --id 097f79ebcbee5000